Book a consultaion
Fill out the form and our administrator will contact you to schedule a visit.
Thank you! Your request has been received. We will contact you shortly.
Oops! Something went wrong. Please try again.

Medical History
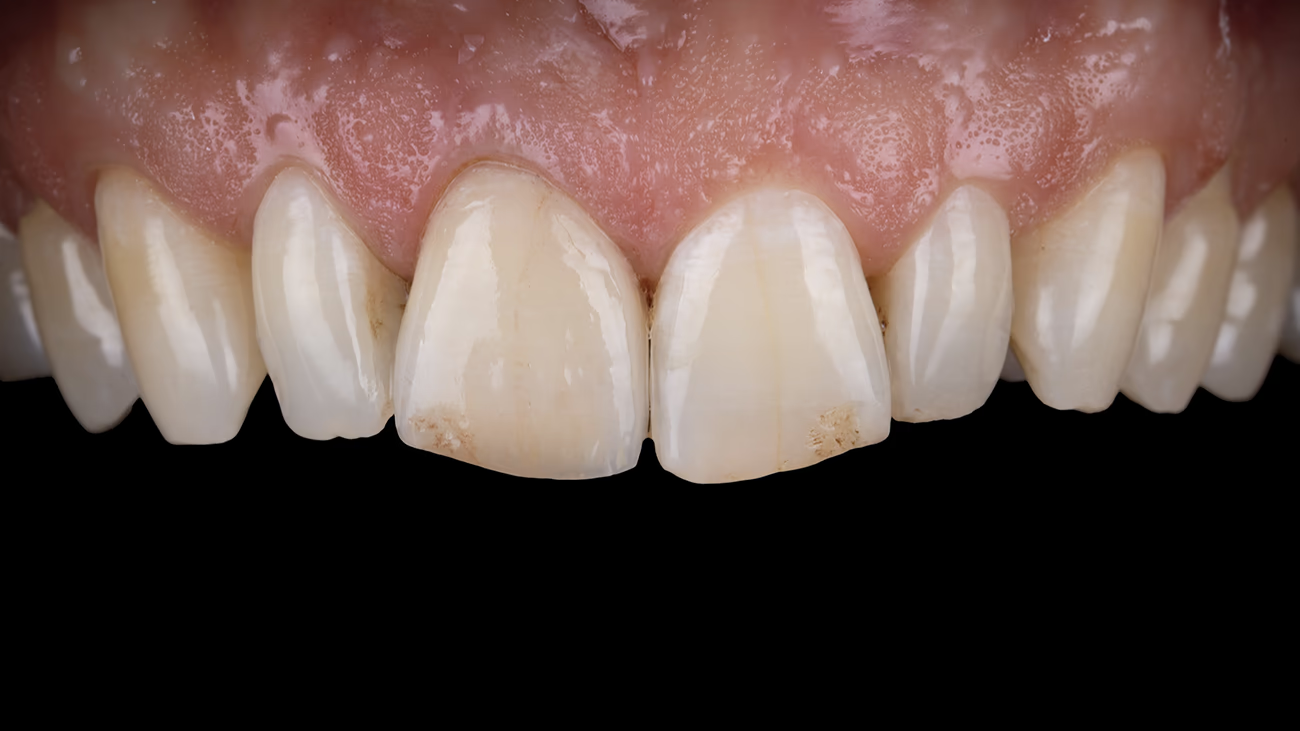
Patient M., 35 years old, presented with complaints about the unsatisfactory appearance of an anterior tooth. His request was to improve the appearance with minimal intervention.
Objective Examination
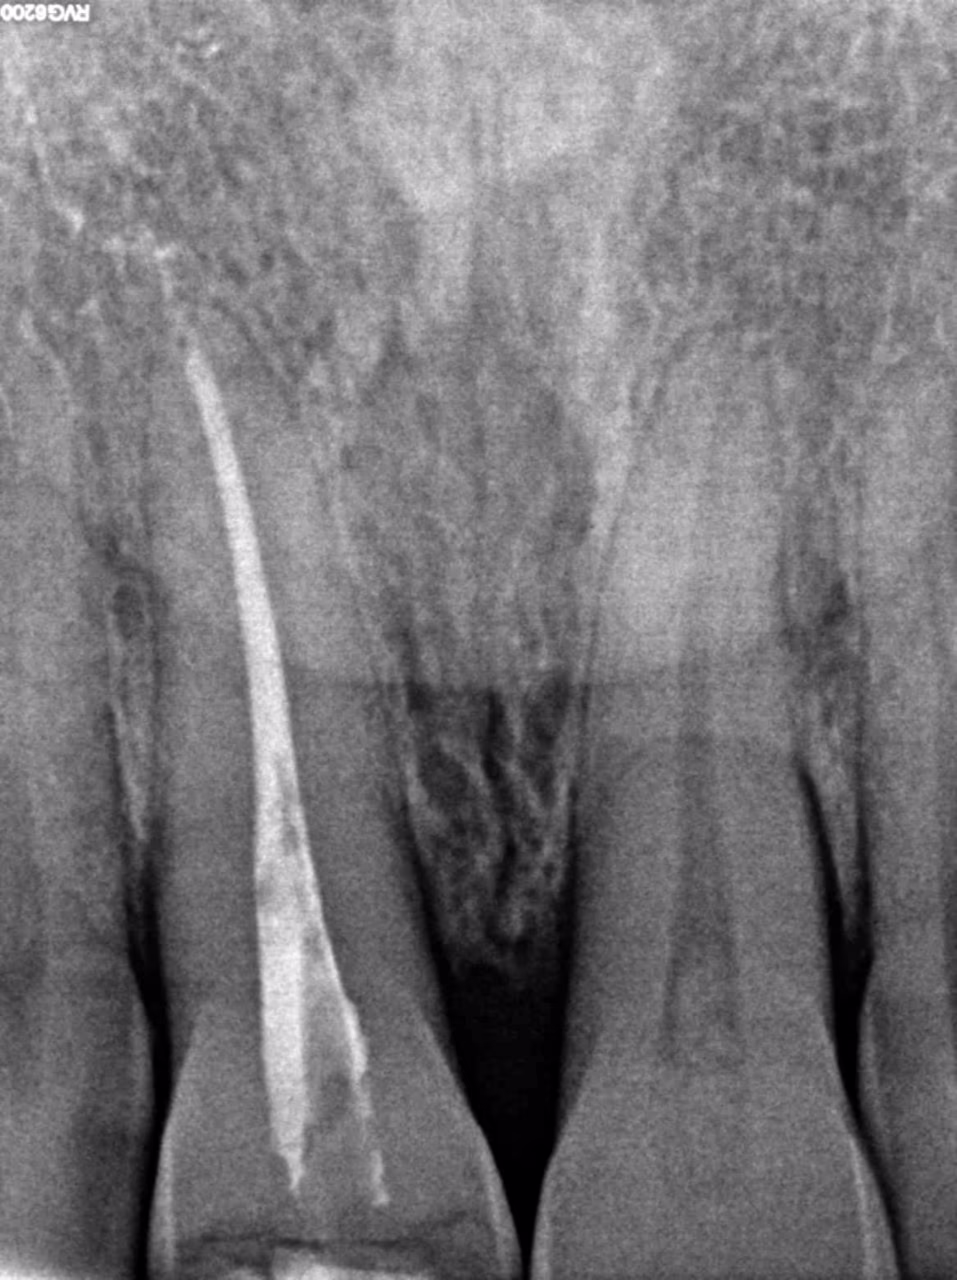
Tooth 11 with a previously performed composite restoration. Medical history includes endodontic treatment more than 5 years ago. The tooth was restored using a fibreglasspost system and composite.
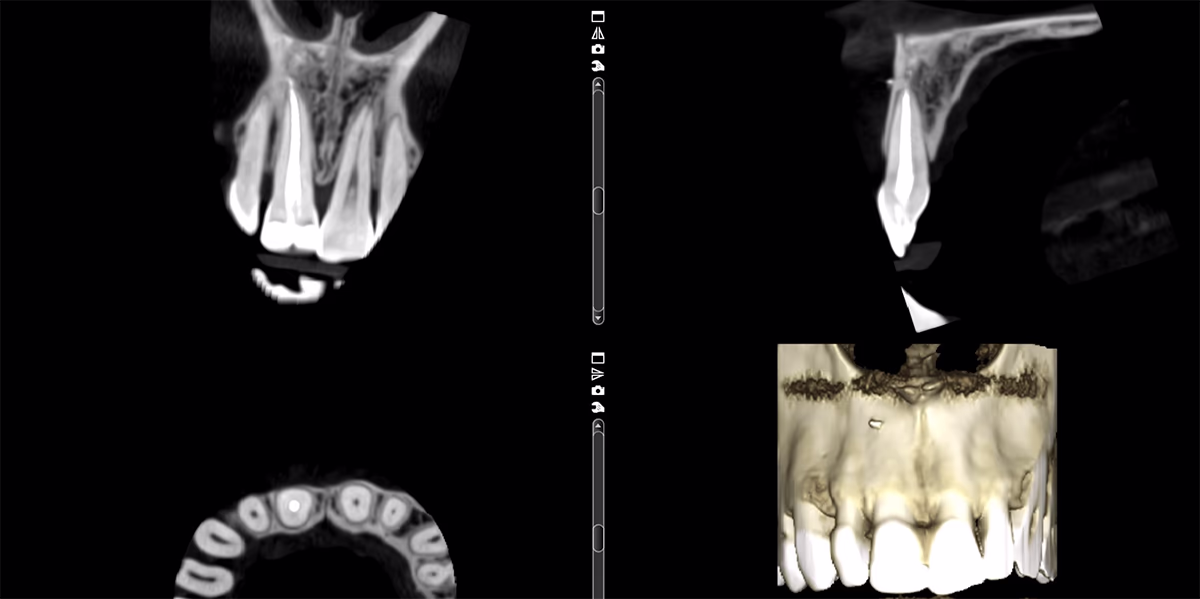
According to CT data: the root canal is homogeneously obturated to the apex, no signs of apical changes. No pocket detected. Periodontal tissue condition is within normal limits.
Options for Restoring Tooth 11:
There is no ideal technique or universal material for restoration. Treatment success is determined by the dentist's knowledge and manual skills.
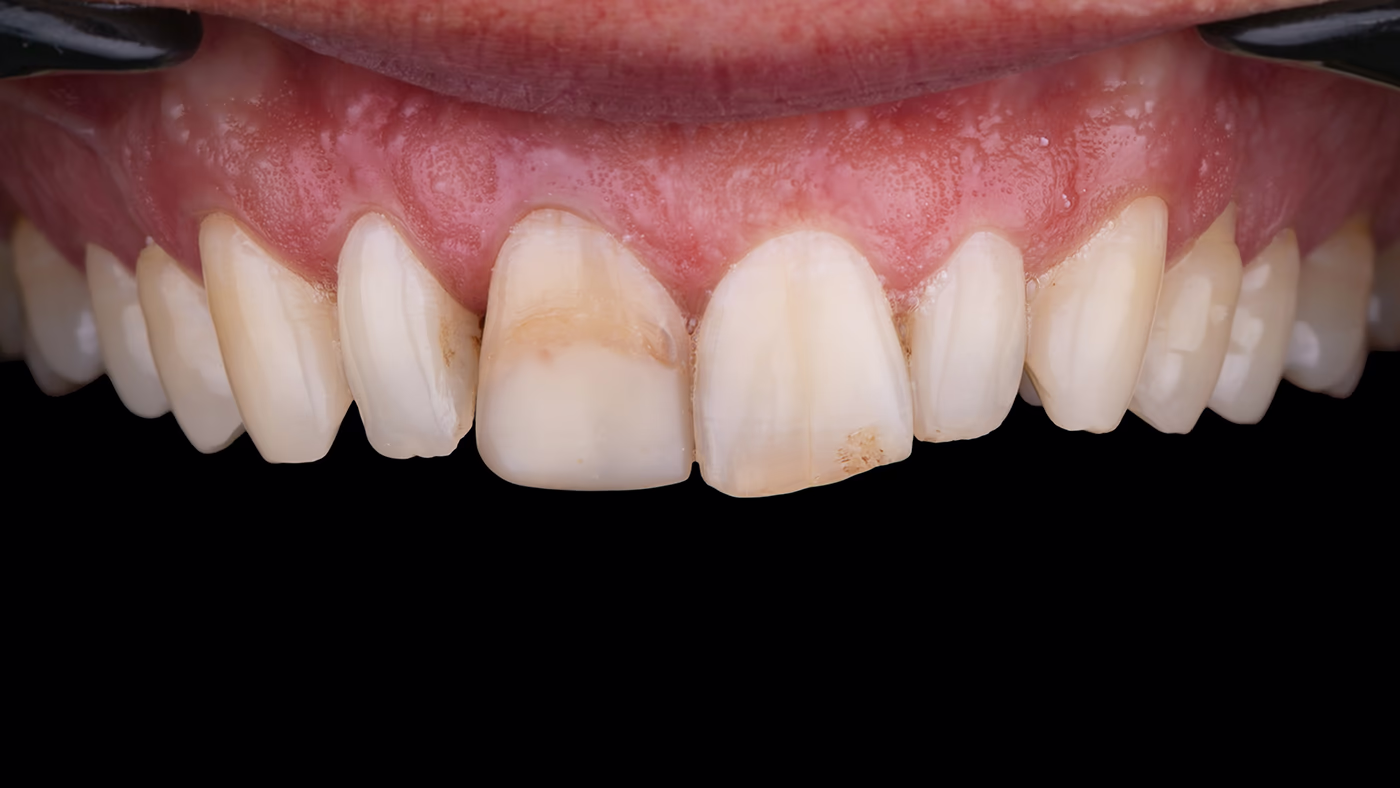
Rehabilitation of patients in the esthetically significant zone requires special precision and attention to detail. These include the selection of color and brightness, restoration shape, and soft tissue condition.
To maximize preservation of intact tissues, it was decided to perform intervention only within one central incisor 11. This task is more challenging for the dentist and dental technician, but allows achievement of the necessary esthetic result with minimal intervention volume.
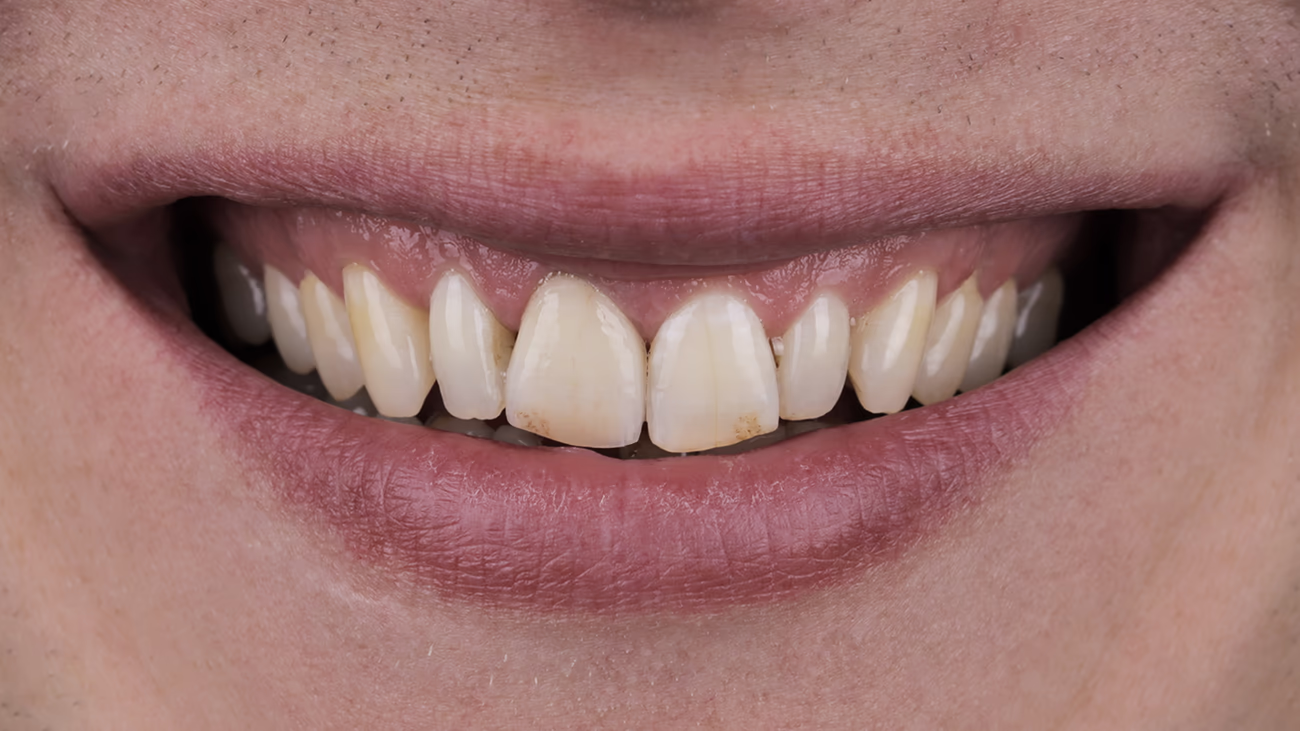
When restoring a single tooth, the key success factor is precise and harmonious optical integration of the restoration into the natural dental arch.
To accomplish this task, the eLAB color determination protocol was used, developed by German dental technician Sascha Hein, a member of the Bio-Emulation group.
The eLAB protocol is a standardized digital tooth color matching system developed to improve accuracy and reproducibility when working with ceramic restorations.
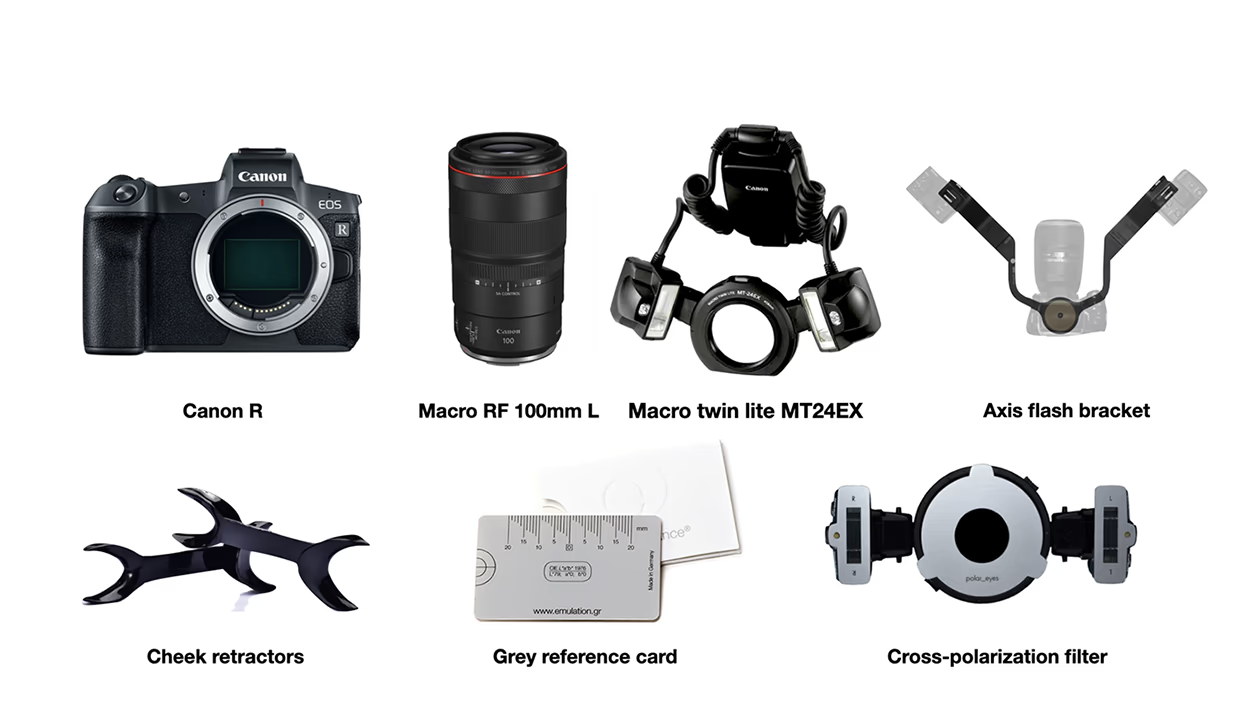
Equipment I Used for Working with eLAB:
Each color is described by three coordinates (LAB):
Treatment Process
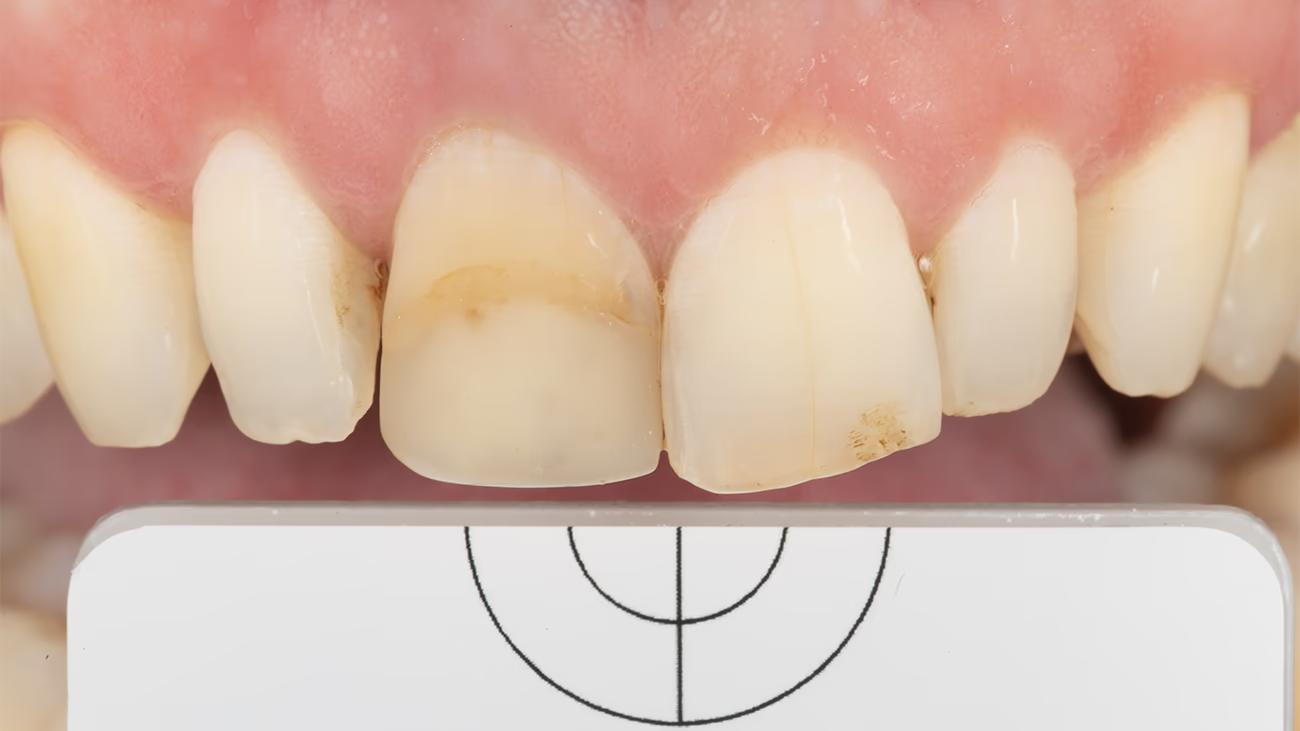
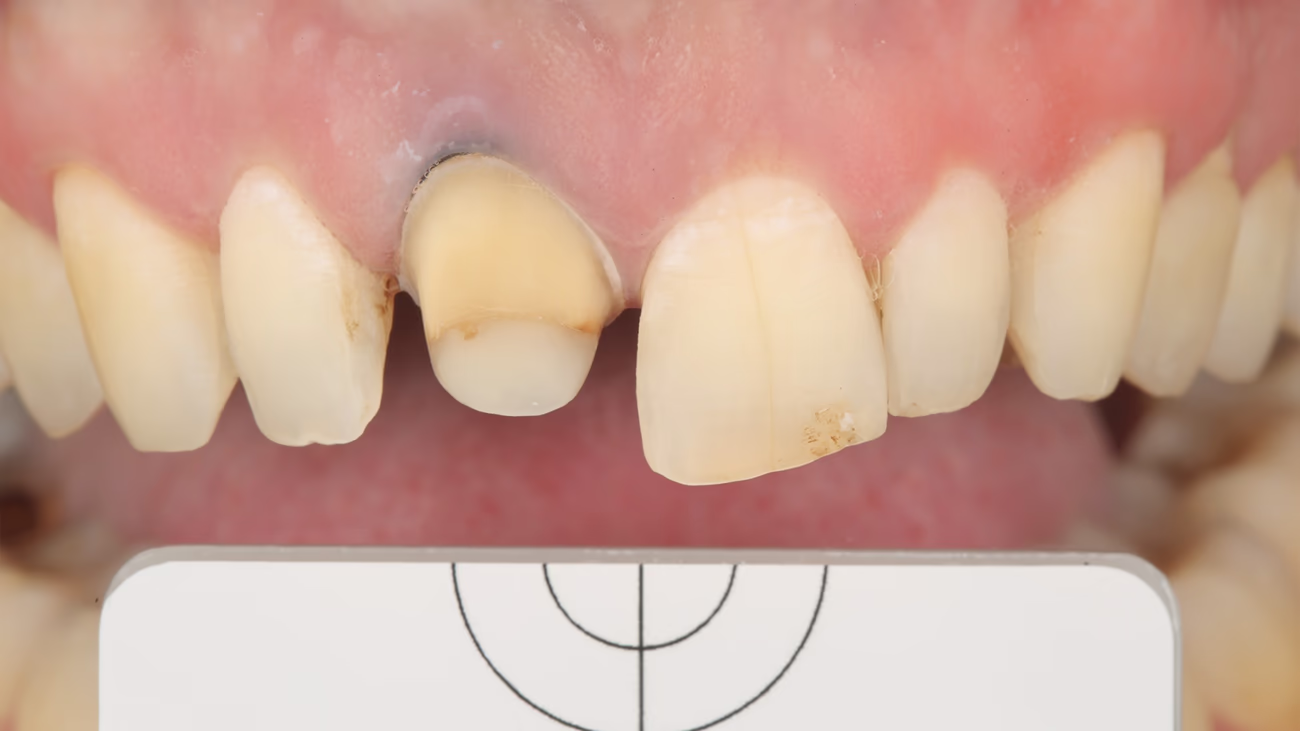
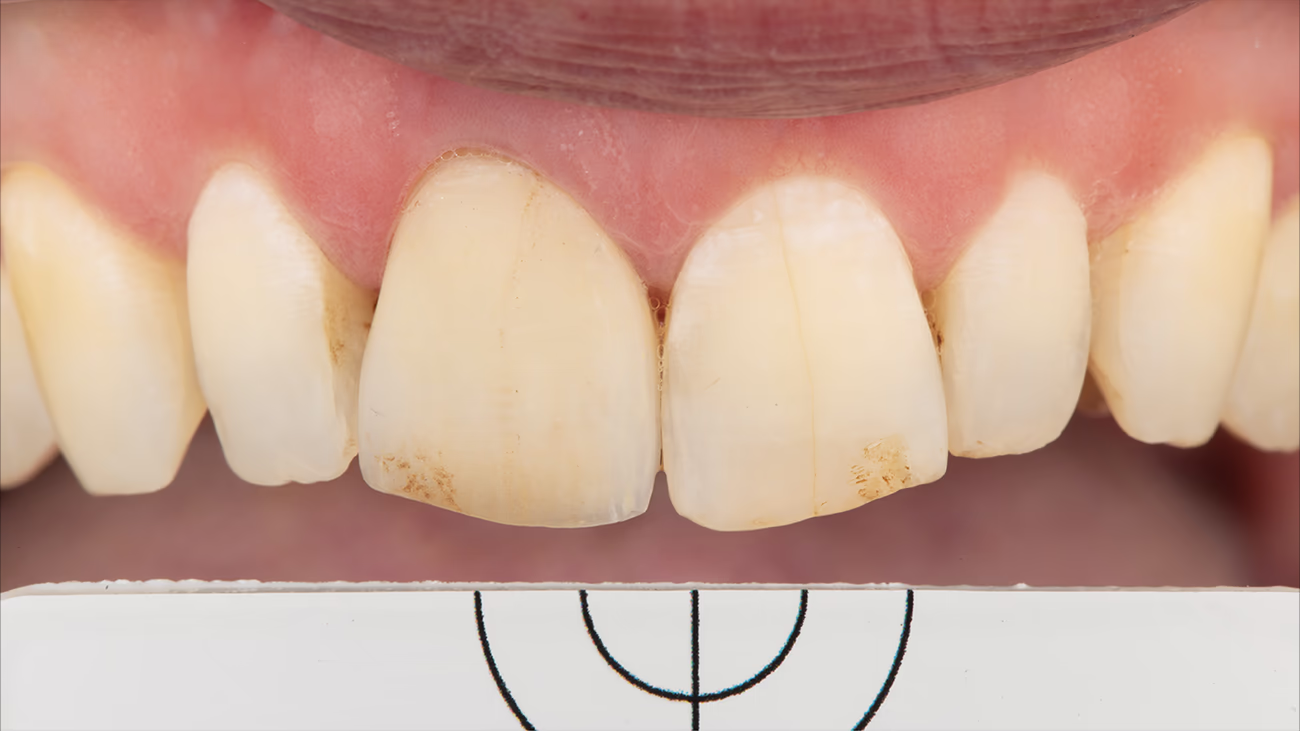
At the first treatment stage, an intraoral photograph of teeth with a polarization filter and a gray card was taken as the baseline clinical situation value.
This is a rare case where we can begin work without preliminary wax modelling(Wax-Up) and Mock-Up transfer into the oral cavity for patient approval.
In this clinical case, the adjacent tooth 21 should be copied and mirrored to ensure harmonious integration by shape into the dental arch.
Using A-silicone, a key was fabricated in the oral cavity for temporary restoration by the direct method before preparation began.
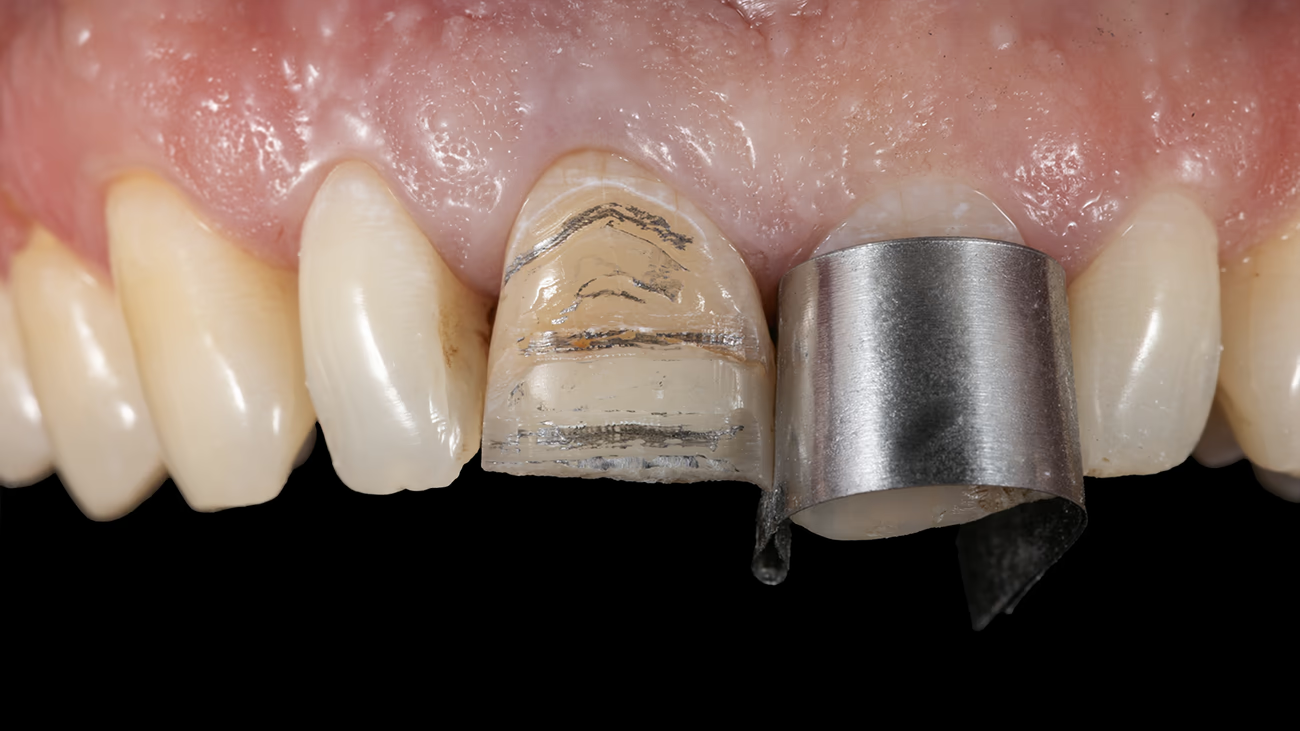
During preparation, adjacent teeth were protected with a metal matrix.
Facial marking of hard tissue preparation depth, as well as incisal edge reduction, were was performed using a marking bur (Komet 868B 314020). Coloring the facial surface of the tooth with a pencil enhances contrast between prepared and unprepared tooth areas and facilitates work.
Horizontal grooves remain colored until the desired preparation depth is achieved. However, the final hard tissue preparation depth in this case was dictated by the composite restoration.
The finish line on tooth 11 needed to remain on the tooth tissues, so all composite was removed. Restoration design – 3/4 crown. In this case, the ledge formed during preparation on the palatal side ensures correct positioning during restoration cementation.
Tooth preparation was performed using an operating microscope. Necessary space was created for ceramic restoration at the soft tissue level.
After completion of the first preparation phase with Komet diamond burs (coarse-grained), retraction was performed with one cord without impregnation 000, providing vertical retraction. Then, using polishing diamond burs (with red marking), we moved the facial finish line more apically, to the new zenith level. This allows hiding and smoothing the tooth-ceramic transition.


For transferring preparation margins to the laboratory, the retraction method using retraction cords was chosen.
The first cord provided vertical retraction, and the second impregnated cord (Sure-Cord 0, 5-minute exposure) provided horizontal retraction. The second cord was placed immediately before taking impressions with a perforated metal tray and A-silicone (DGM, Honigum Pro), after pre-coating the tray with tray adhesive (Panasil Haftlack).
The adhesive between the base polyvinyl-siloxane impression material and perforated tray ensures the absence of deformation in impressions.
Before temporary restoration cementation on tooth 11, a photo of the prepared tooth preparation with polarization filter and gray card was taken.
This is additional information for the dental technician about the condition and color of the tooth preparation.

For reliable temporary restoration cementation, spot etching and bonding without preliminary polymerization were performed.
The next step was creating a temporary construction by direct method and transfer using a silicone key and self-curing bis-acryl plastic (DMG Luxatemp).
After removing the silicone key, excess plastic in the gingival area was corrected with a scalpel.
Adhesive polymerization on tooth 11 with temporary restoration was performed for 20 seconds.
Impressions and RAW format photos were transferred to the dental laboratory for ceramic restoration fabrication. In this case, lithium disilicate material with a layered ceramic application on the facial surface was chosen for restoring tooth 11.
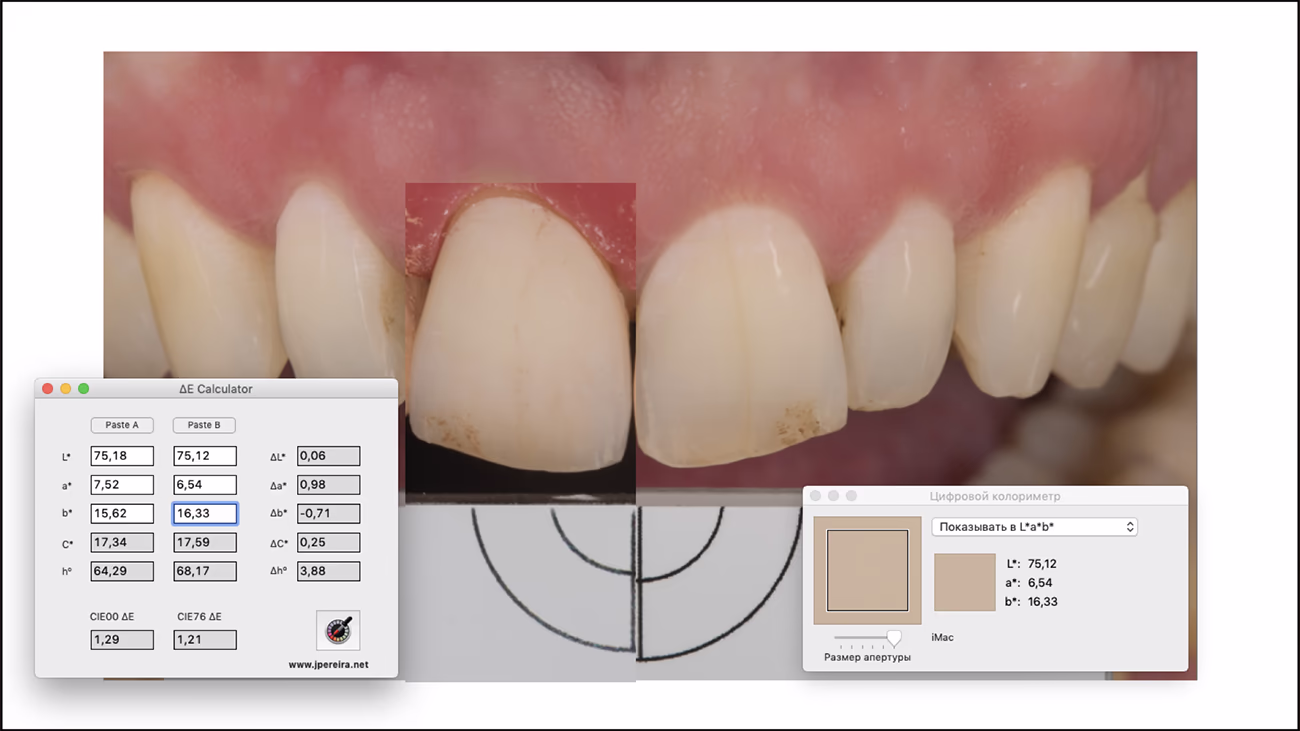
The advantage of the eLab protocol is virtual try-in and comparison of the finished ceramic restoration of tooth 11 and adjacent tooth 21.
Digital try-in , according to the eLAB protocol, allows the dental technician to evaluate the future ΔE, reflecting the difference between the color of natural tooth 21 and the fabricated ceramic restoration of tooth 11.
ΔE (Delta E) is a numerical indicator of color difference in the LAB system: the smaller its value, the closer the ceramic restoration shade is to the natural tooth.
Practical Significance of ΔE:
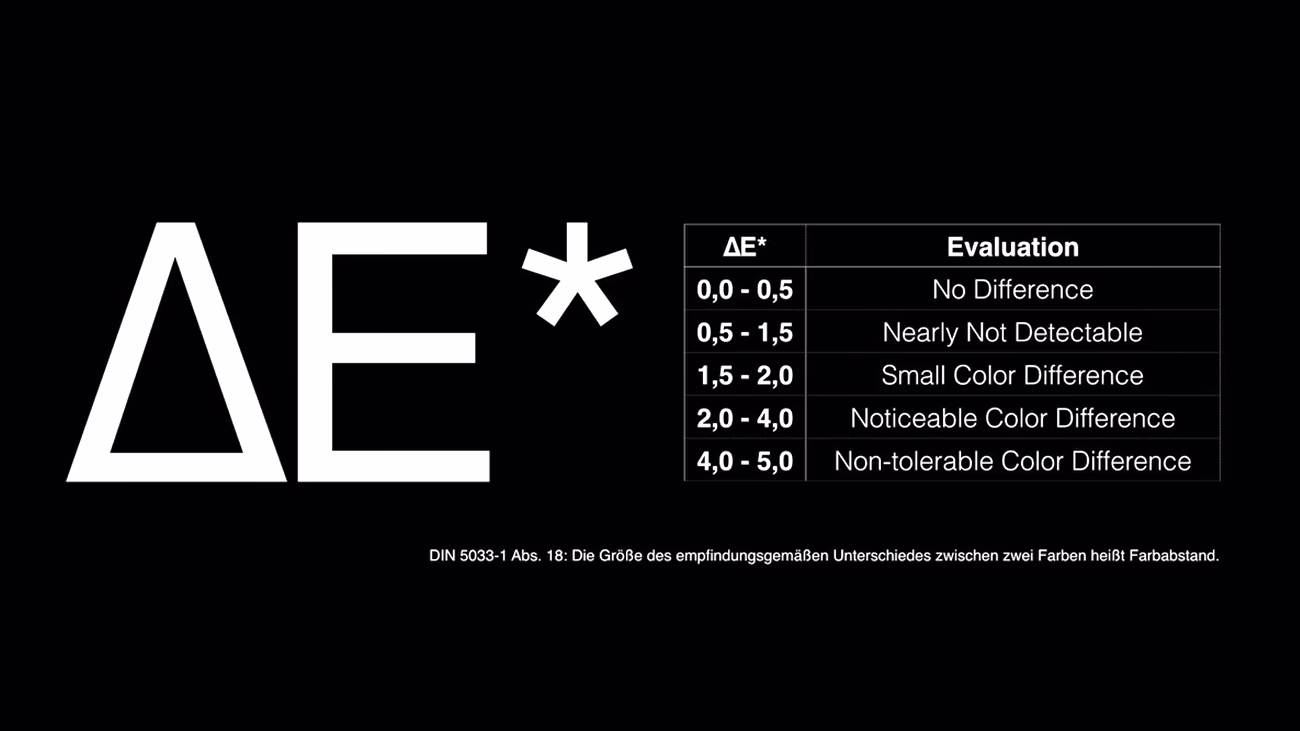
Virtual try-in in the dental laboratory showed a ΔE value of 1.21. The Difference is practically imperceptible to the naked eye. In clinical practice, considered an ideal result.
During the patient's next visit to the clinic, we perform try-in and cementation of the ceramic restoration of tooth 11.
The first step was removing the temporary restoration of tooth 11 and polishing the preparation from adhesive residue.
Dry fit try-in of the permanent restoration allows control of construction fit accuracy.
After ensuring that the ceramic restoration meets the esthetic requirements of the patient and dentist, adhesive cementation can begin.
Ceramic restoration cleaning was performed using the air-abrasion method with 27 μm aluminum oxide, which effectively removes contamination after intraoral try-in and creates surface micro-roughness, increasing adhesion area.
Dynamic etching of lithium disilicate restoration with 4.5% hydrofluoric acid for 20 seconds.
Exposure of 96% ethyl alcohol on the ceramic surface for 30 seconds to clean the hydrofluoric acid residue.
Ceramic surface silanization using Monobond Plus (Ivoclar) to create internal bonding between restoration and luting material.
ClearFil SE Bond 2 (Kuraray) adhesive system was applied to the silanized ceramic surface, 20-second exposure, then excess removed with air.
Application of Variolink Esthetic LC luting composite.
To prevent composite cement hardening, restorations were placed in an orange light-protective box.
Adjacent teeth were protected with Teflon.
Air-abrasion preparation of tooth 11, preparation was also performed with 27 μm aluminum oxide powder.
Dynamic tooth etching for 30 seconds. Adhesive preparation was performed with the ClearFil SE Bond 2 (Kuraray) system.
Excess luting material was removed with a brush from the facial surface, and restoration polymerization was performed.
Floss was used to remove excess cement at proximal contacts.
After restoration cementation, control photographs were taken using a polarization filter and without it.
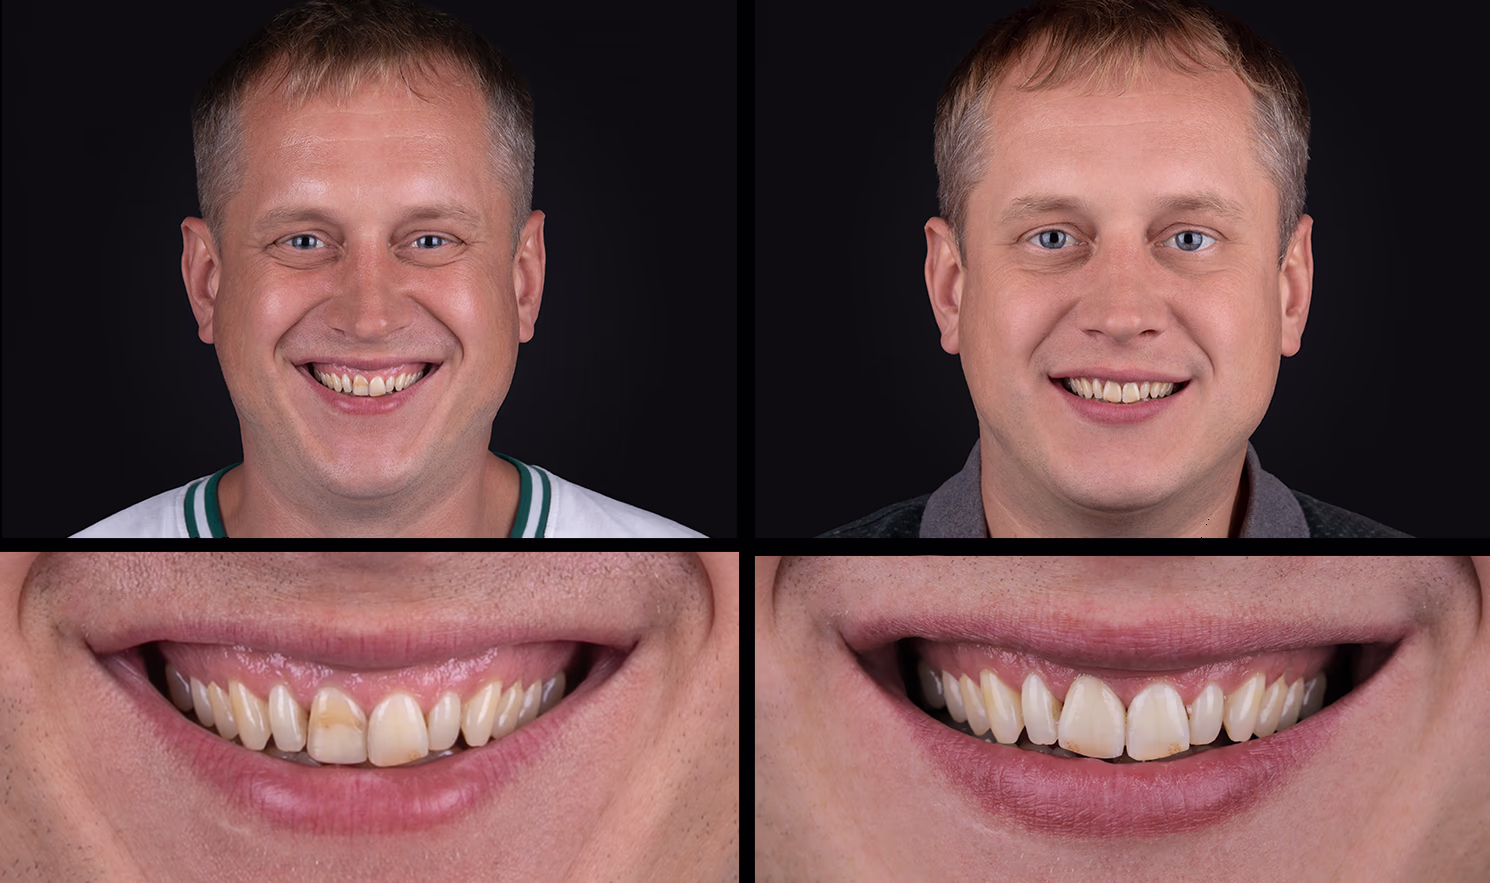

The eLAB protocol became a key tool for achieving precise color matching and flawless esthetics. Clear digital data transmission and well-coordinated work between dentist and dental technician allow predictable integration of an individual ceramic restoration into the dental arch and reproduction of smile harmony even in the most complex clinical cases.