Book a consultaion
Fill out the form and our administrator will contact you to schedule a visit.
Thank you! Your request has been received. We will contact you shortly.
Oops! Something went wrong. Please try again.
Patient History
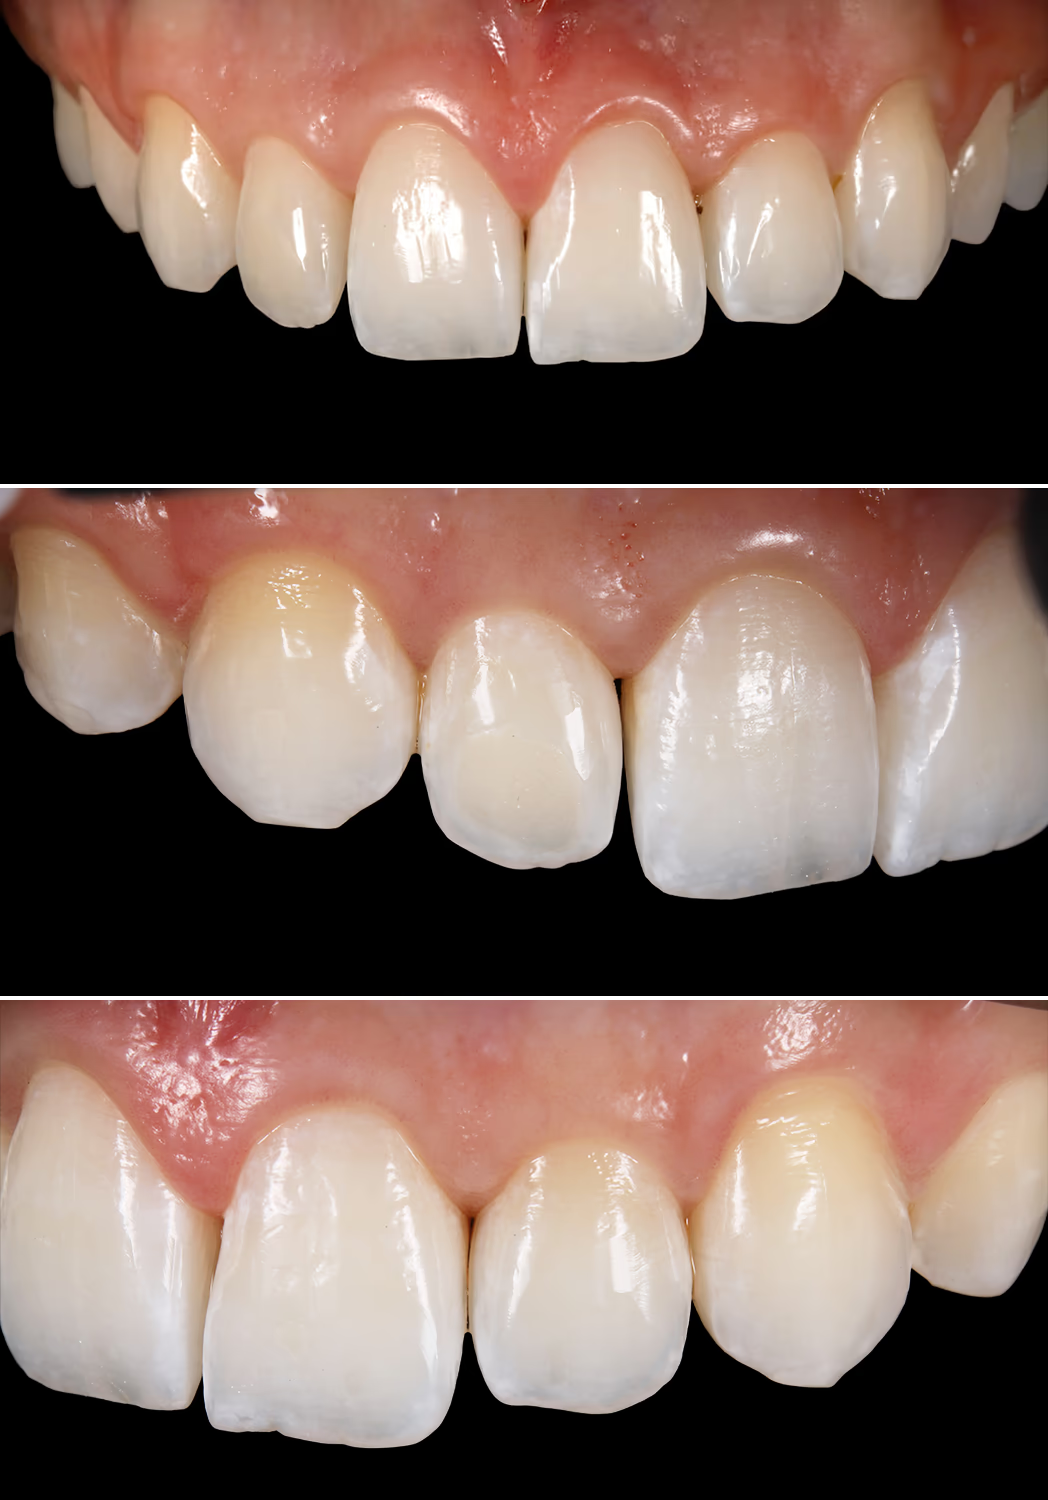
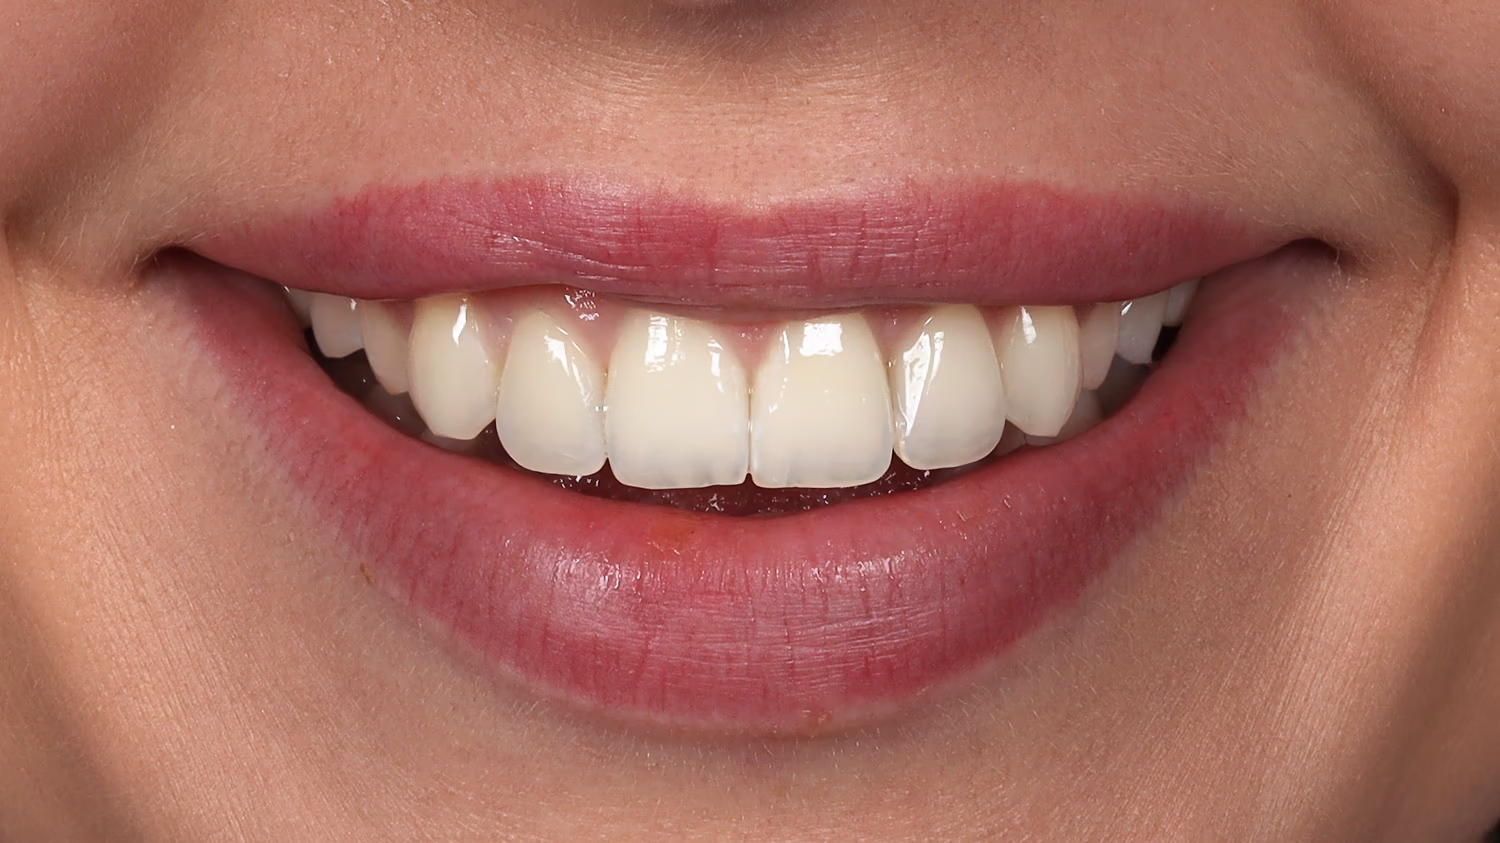
Patient E., 22 years old, presented to the clinic with a chief complaint of improving the esthetic appearance of her maxillary lateral incisors.
Clinical Findings
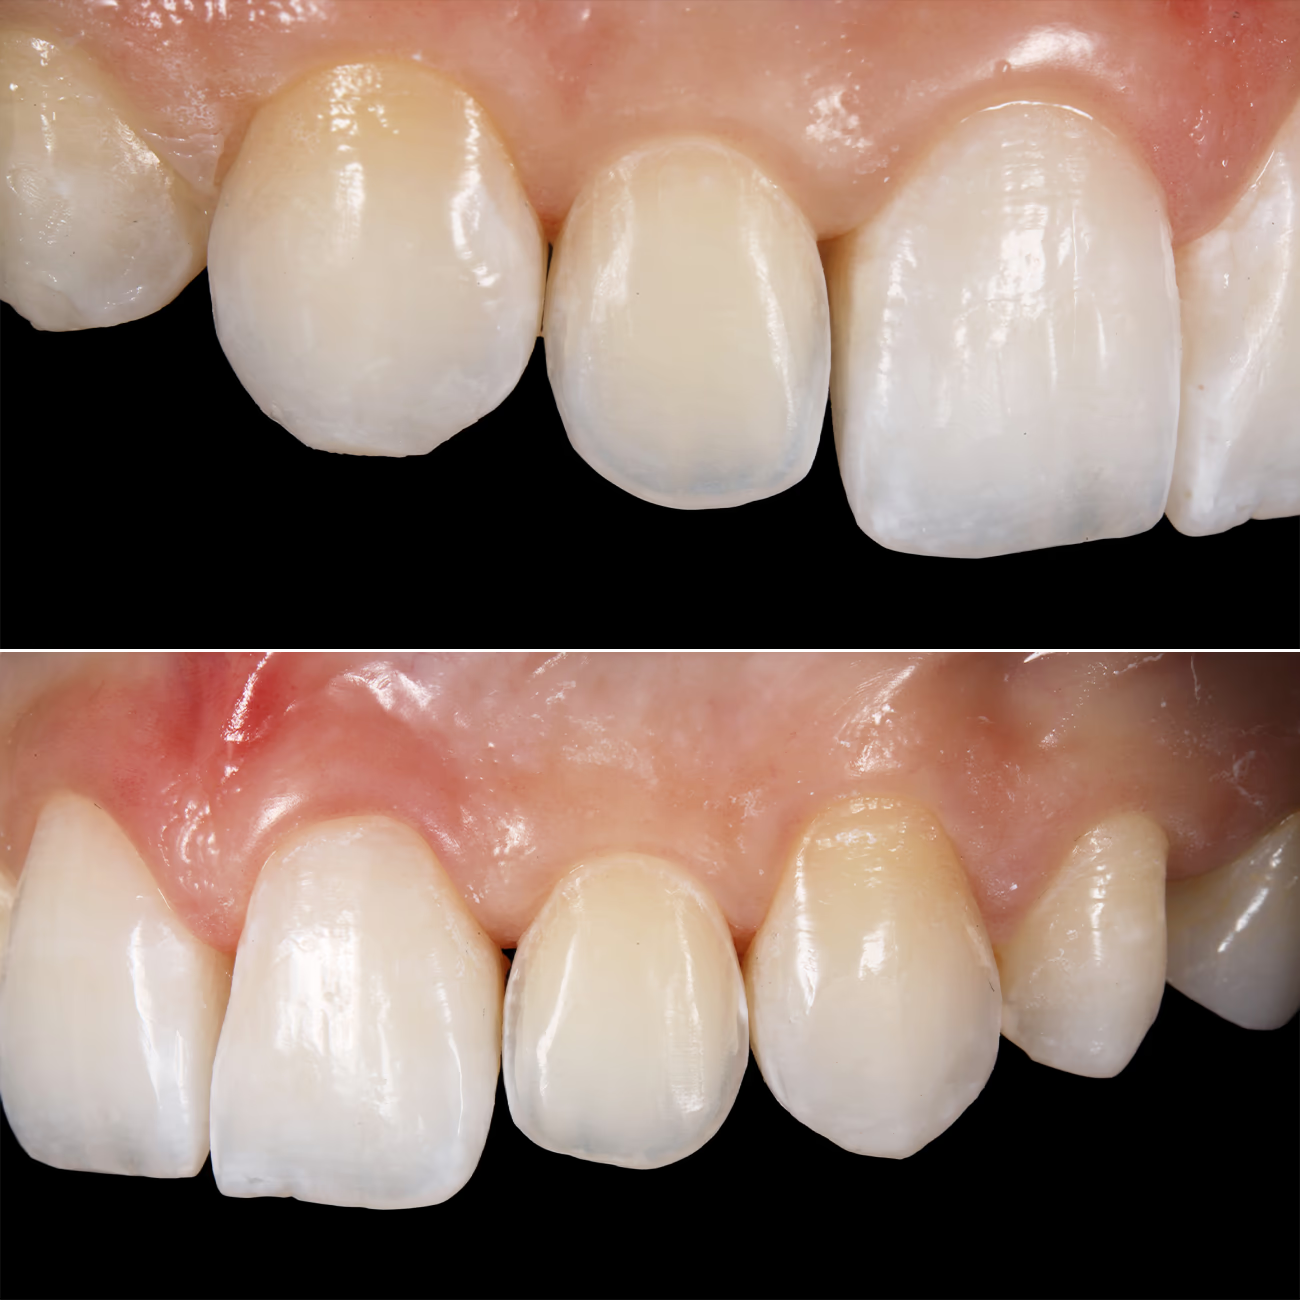
Following completion of orthodontic treatment, diastemas appeared between teeth #7, #8 and #9, #10. The lateral incisors exhibited relative microdontia. The teeth are of normal dimensions but appear small in proportion to the central incisors.
Treatment Options for Diastema Closure and Incisal Edge Lengthening:
No single ideal technique or material exists for tooth restoration. Treatment outcomes depend significantly on the clinician's knowledge base and manual dexterity.
When rehabilitating patients in the esthetic zone, seamless integration of restorations presents a significant clinical challenge.
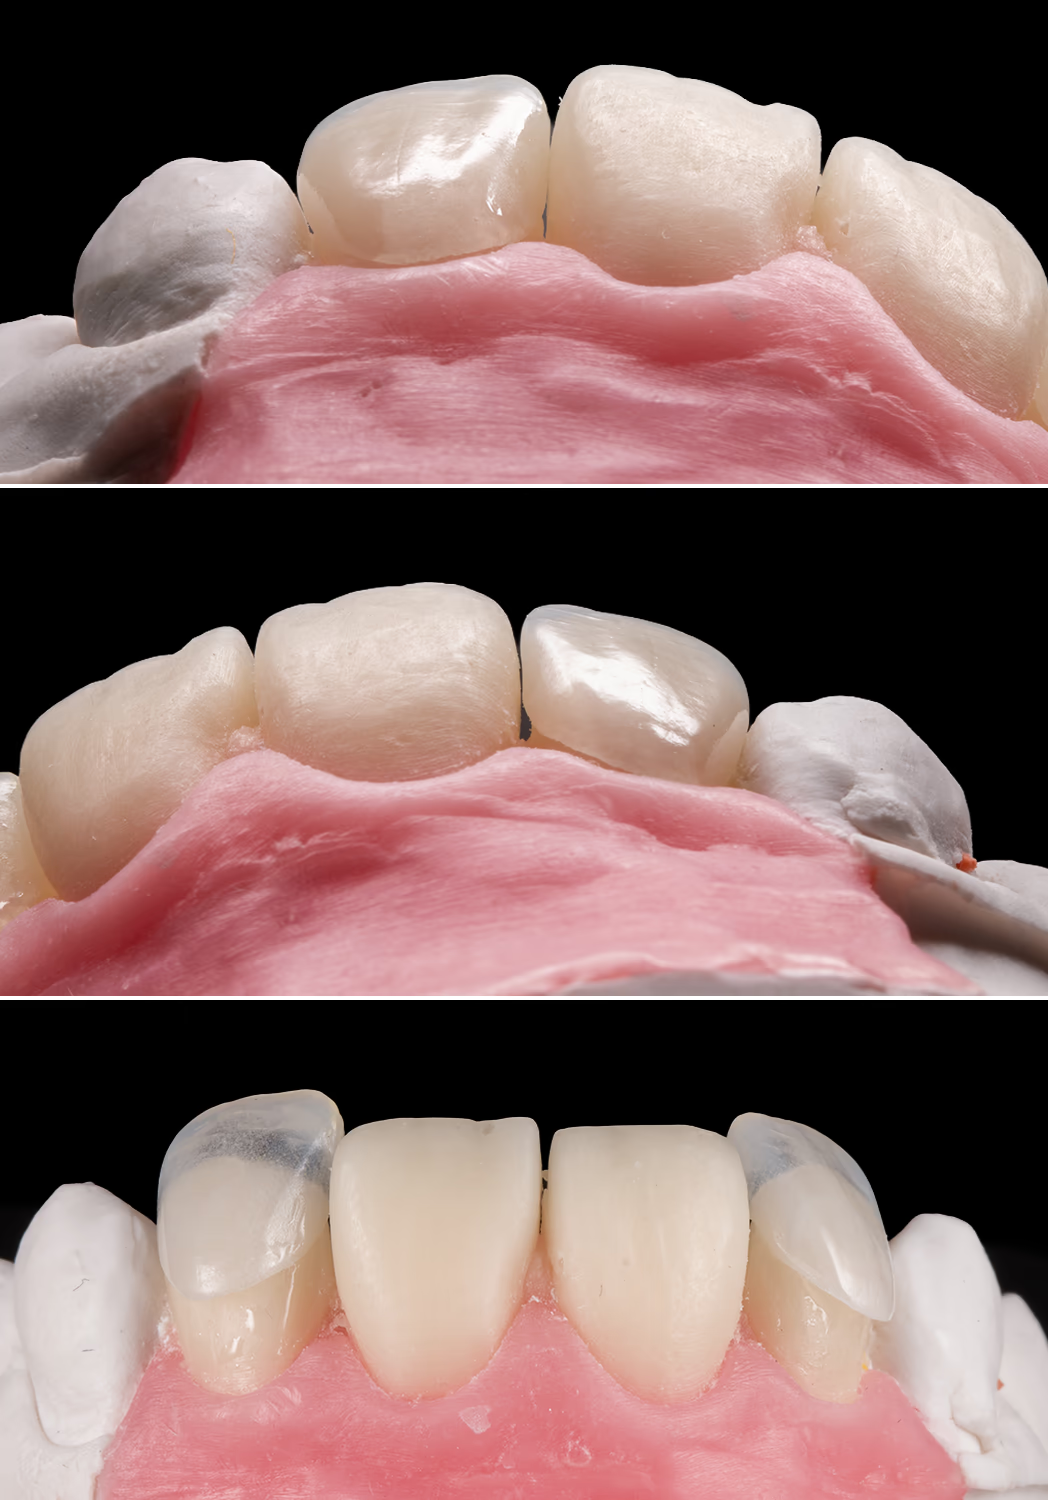
In this clinical scenario, the decision was made to fabricate two ceramic veneers using the refractory technique.
Tooth preparation with minimal enamel reduction under an operating microscope allowed for the fabrication of ultra-thin veneers. The advantage of ultra-thin veneer placement lies in their translucency, which eliminates the shade-matching step. The optical properties and color of the underlying tooth structure show through the ceramic restorations, creating a unified and imperceptible appearance in the oral cavity.
First Appointment:
Second Appointment:
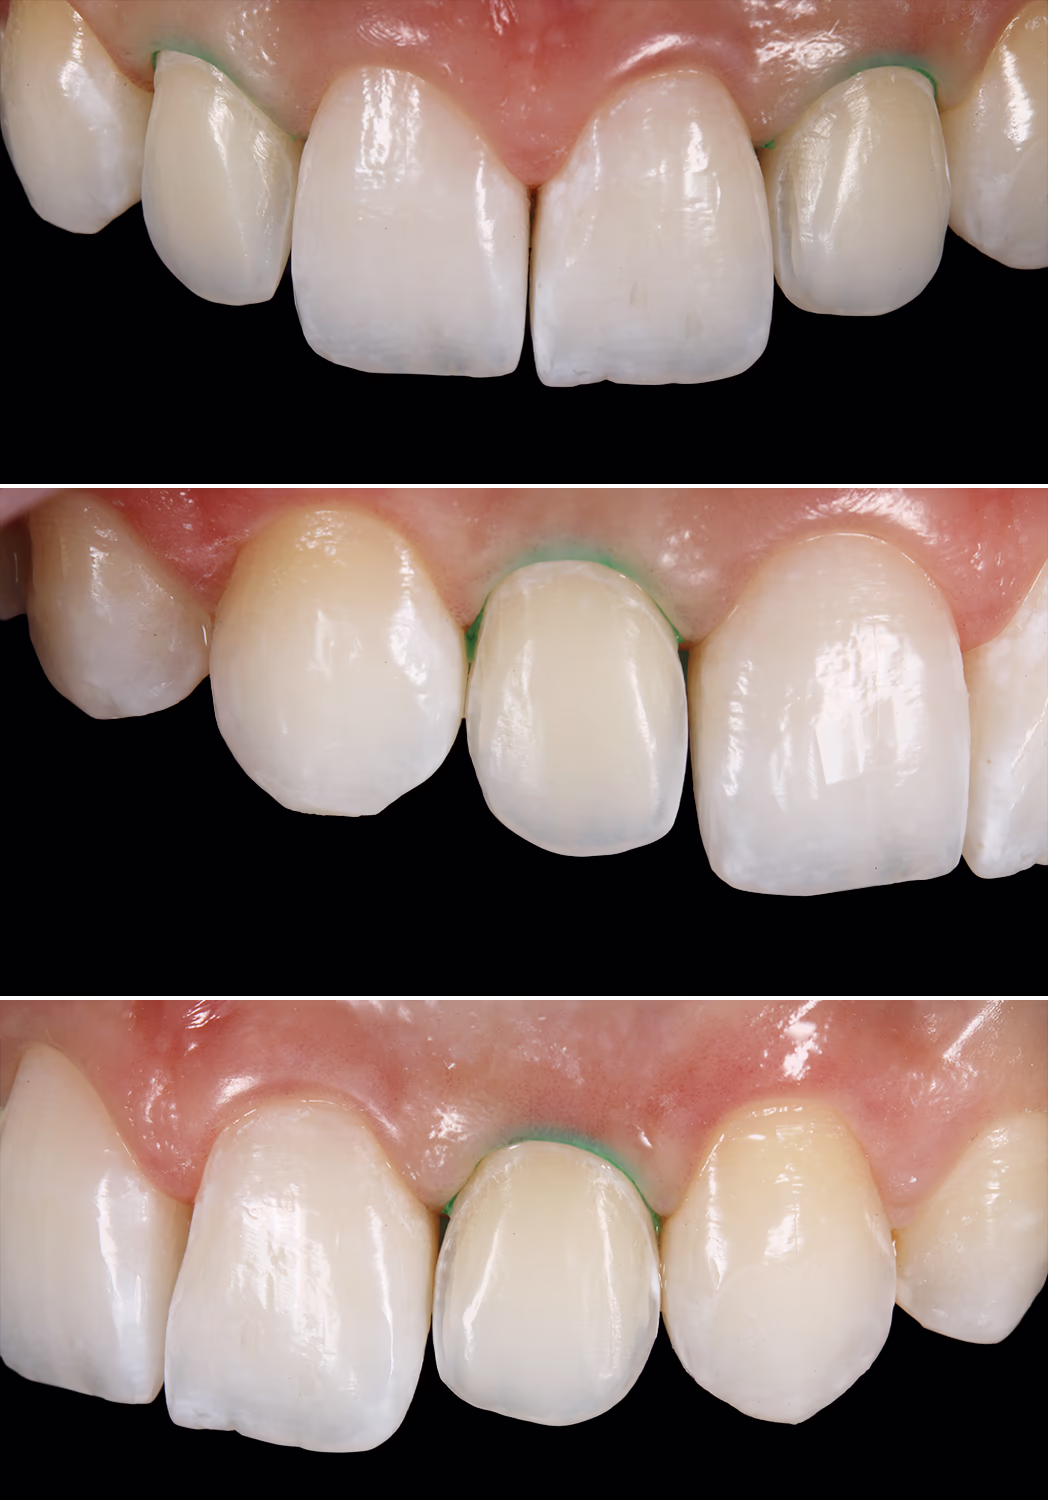
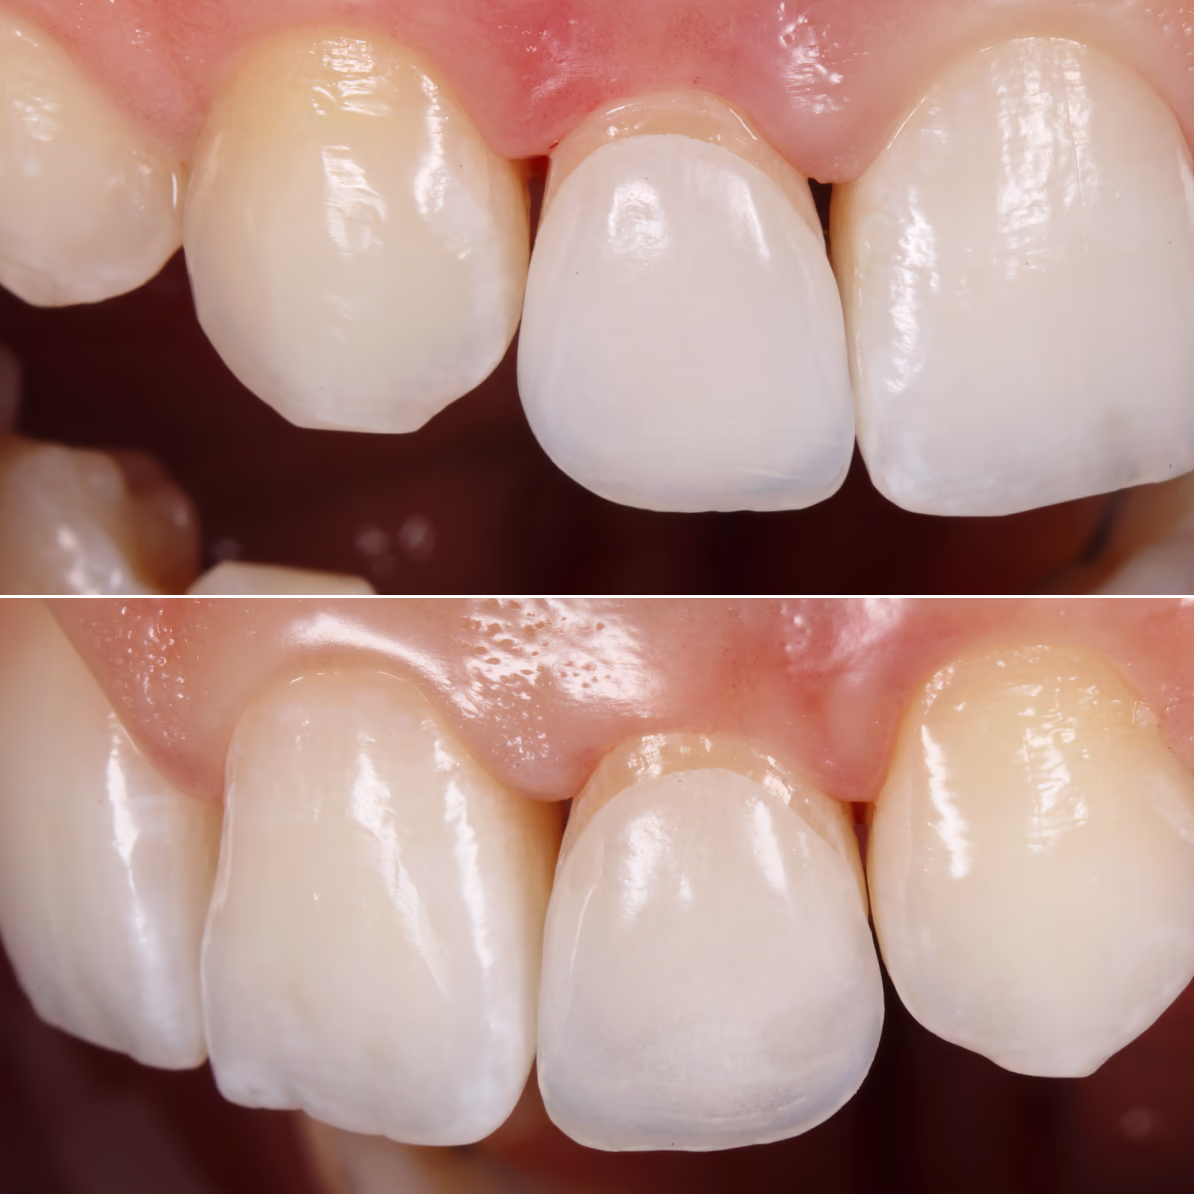
Following patient acceptance, a local anesthetic was administered via infiltration. Teeth #7 and #10 were prepared using Komet diamond burs (868314012, 8868314012). Preparation was limited to enamel in a window-type design (Pascal Magne Type 1) without incisal edge reduction and retraction at the soft tissue level. The facial contours were satisfactory; the preparation objective was the removal of the aprismatic enamel layer and creation of adequate space for ceramic thickness. Mechanical retraction using unpacked cord (Sure-Cord 000) was selected for communicating the finish line to the laboratory.
Given the minimal enamel-only preparation and refractory veneer fabrication method, digital scanning accuracy was questionable; therefore, conventional impressions were taken using polyvinyl siloxane material.
Minimal preparation eliminated the need for desensitizing agents.
Spot-etching and bonding without light-curing were performed for reliable provisional restoration retention. Provisional restorations were fabricated using the direct technique with Ivoclar Telio CS C&B self-curing resin transferred via silicone matrix. After matrix removal, excess resin was trimmed with a 12D scalpel blade. The adhesive was then light-cured for 20 seconds on teeth #7 and #10.
Third Appointment - Ceramic Veneer Cementation:
Provisional restoration removal and enamel polishing with Enhance to eliminate adhesive remnants
First dry-fit try-in to verify restoration adaptation
Second try-in with Ivoclar Try-In paste (Neutral shade) to simulate the final cement shade
After confirming proper diastema closure, appropriate form, length, color, and patient satisfaction with the esthetic outcome, adhesive cementation proceeded.
Rubber dam isolation was not utilized to prevent displacement of interproximal contacts, which could cause ceramic fracture during cementation, given the 0.2mm restoration thickness.
Ceramic restorations cleaned with Ivoclean paste (Ivoclar) to effectively remove contamination from intraoral try-in:
Ceramic surface silanization with Monobond N (Ivoclar) to establish chemical bonding between restoration and luting materia
Restorations were placed in an orange light-protective box to prevent premature polymerization
Tooth Surface Treatment and Cementation
Isolation achieved with OptraGate (Ivoclar); adjacent teeth protected with PTFE tape.
Following isolation:

Spot-cure veneers for 3 seconds
Soft-start mode on the curing light is critical during final polymerization.
To prevent discoloration at the tooth-ceramic interface, the oxygen-inhibited layer must be removed using Air Block. Residual adhesive and cement were carefully trimmed with a scalpel blade.
Final polishing of the composite margin was completed using the air-abrasion technique with Perio Kit tip and glycine powder (Prophyflex Perio Powder, KaVo).
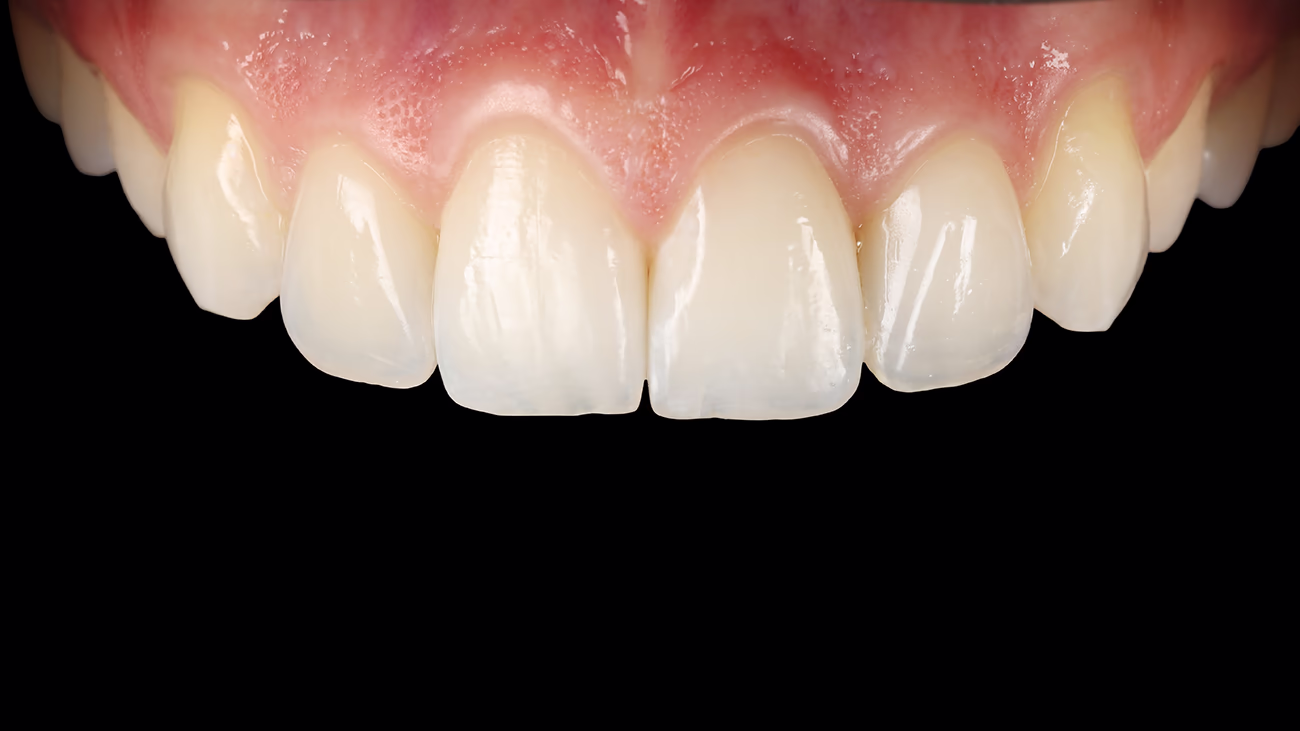
Esthetic rehabilitation can be accomplished through various minimally invasive approaches. Indirect ceramic restoration represents one effective method that preserves tooth structure while achieving optimal esthetic outcomes.