Book a consultaion
Fill out the form and our administrator will contact you to schedule a visit.
Thank you! Your request has been received. We will contact you shortly.
Oops! Something went wrong. Please try again.
Many patients seek aesthetic improvement after completing orthodontic treatment. This article presents a clinical case of restoring smile aesthetics by transforming canines into lateral incisors and first premolars into canines. Several techniques can achieve an excellent aesthetic outcome, including indirect ceramic veneers. The final choice depends on the clinician’s approach and the patient’s needs.

Patient History
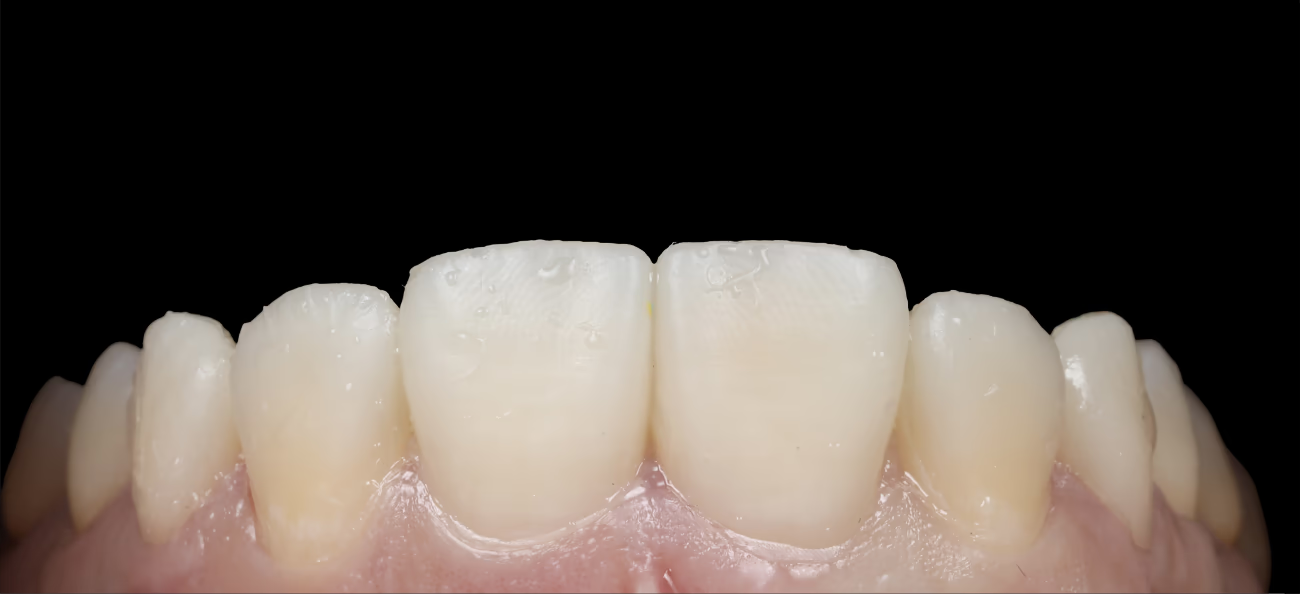
A 29-year-old patient visited the clinic requesting an improved appearance of the teeth after orthodontic treatment.
Clinical Findings
After orthodontic treatment, the upper lateral incisors (teeth 12 and 22) were missing. Their positions were taken by canines (13 and 23), and the first premolars were positioned where the canines normally are. Tooth 11 had an existing direct composite restoration.
Clinical Goal
To achieve proper function and aesthetics, the plan included:
Possible Treatment Approaches
Several clinically acceptable methods could be used:
There is no universal “ideal” material or technique. Treatment success depends heavily on the clinician’s expertise and manual skills.
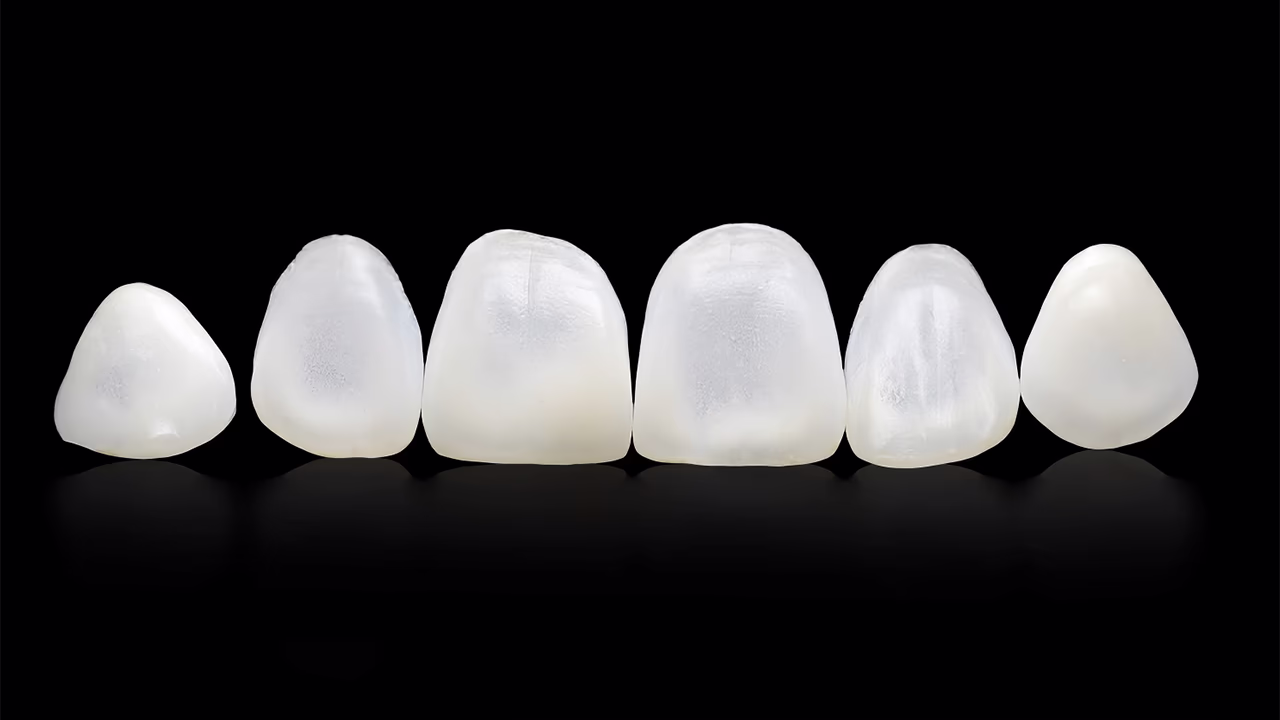
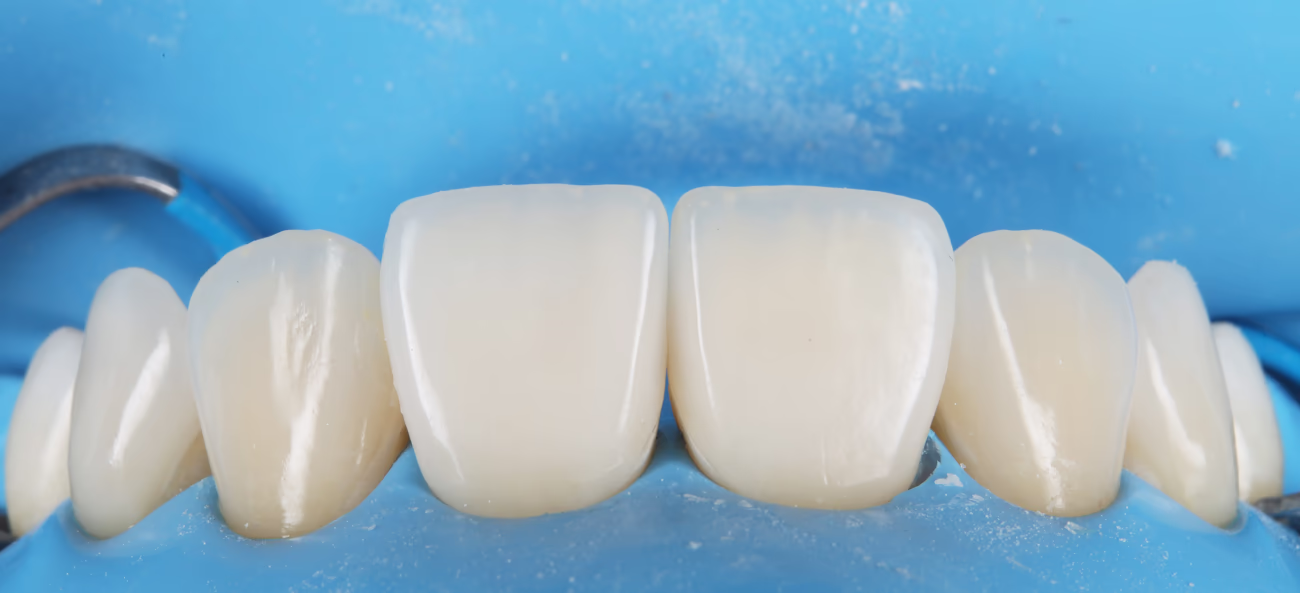
It was decided to fabricate 6 ceramic veneers on the refractor.
The first patient visit was diagnostic: tooth scanning, photo and video analysis of face and smile were performed. The standard evaluation reference is the smile line – an imaginary line passing along the maxillary tooth edges.
The smile line can be high, medium, or low. Our patient has a low smile line; the upper lip covers tooth zeniths, which significantly simplifies work. A high smile line, when not only anterior teeth but also the gingiva are fully visible, is the most challenging to work with.
Information obtained after the diagnostic visit was transmitted to the dental laboratory for wax-up fabrication (final result prognosis).
During the second visit, using A-silicone, we duplicated the wax-up from the printed model, creating a silicone key for transfer.
A canine differs from a lateral incisor in size – the facial volume of canines is greater than that of lateral incisors, and canine form is characterized by the presence of a cusp tip. A premolar also differs from a canine primarily in form, so preliminary selective grinding is required.
Before beginning this stage, the patient should be warned that selective grinding is an irreversible process.
Several selective grinding options exist:
In this case, freehand selective grinding was performed, guided by the design, after infiltration anesthesia was administered.

Using the silicone key, we transferred the mock-up of future teeth (mock-up) to the selectively ground teeth.
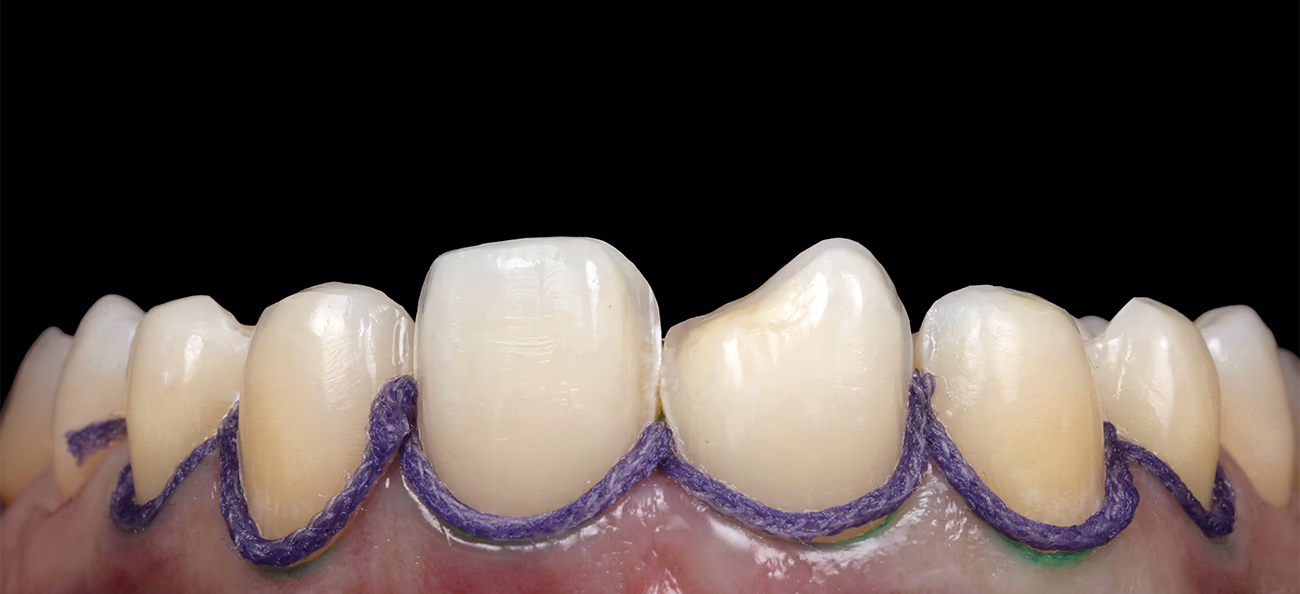
Facial marking of hard tissue preparation depth, as well as incisal edge reduction, was performed behind the mock-up with Komet 868B 314018 marking bur (Komet, Germany).
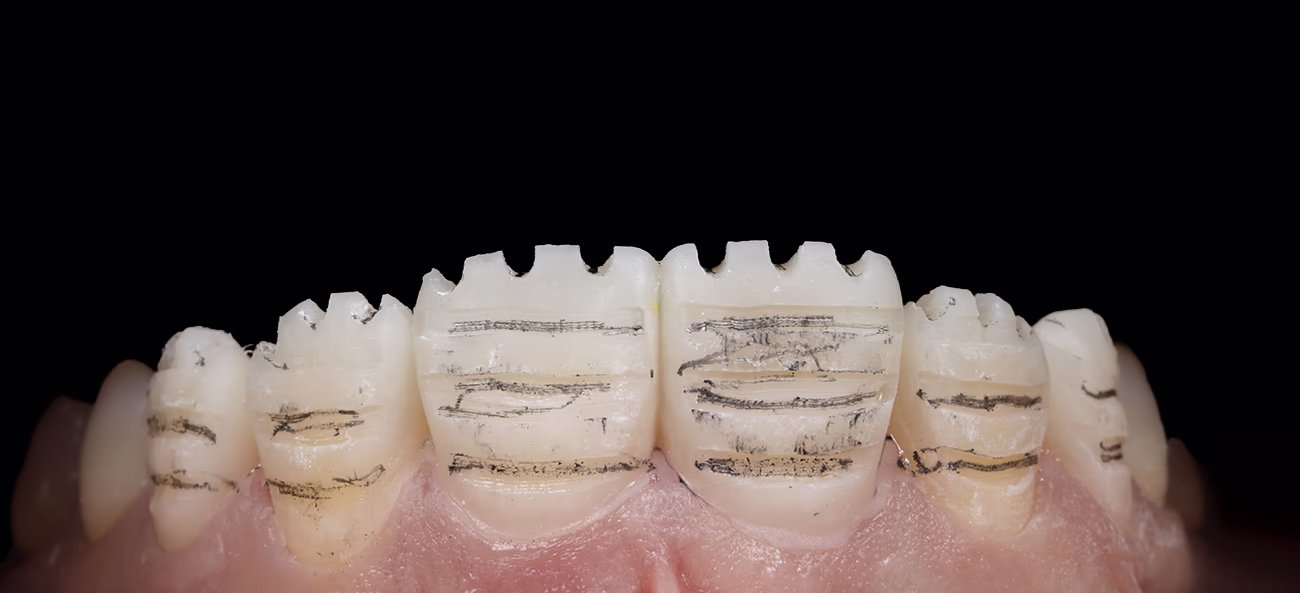
Then the mock-up was removed. Horizontal marks colored with pencil remained on the teeth. Coloring the facial surface of the tooth with a pencil enhances contrast between prepared and unprepared tooth areas and facilitates work. Horizontal grooves remain colored until the required preparation depth is achieved.
Preparation of teeth 11, 13, 14 and 21, 23, 24 was performed with Komet diamond burs 868 314 012, 8868 314 012, 868 314 016, 8868 314 016. On tooth 11, the old composite restoration was completely removed. Therefore, the preparation limit is the tooth's own tissues.
Incisal edge reduction within 1 mm allows ensuring smooth transition of translucency and achieving optimal esthetic result.
The ledge formed with minimal incisal edge preparation ensures correct veneer positioning during cementation.
Tooth preparation was performed using an operating microscope. Within the enamel boundaries, a necessary space was created for the ceramic at the soft tissue level.
For transferring preparation margins to the laboratory, the chemomechanical retraction method using retraction cords was chosen.
The first cord without impregnation, Sure-Cord 000 provided vertical retraction.

Then a second impregnated cord, Sure-Cord 0 (5-minute exposure), was placed, providing horizontal retraction. It was placed immediately before taking the digital impression.
For reliable temporary construction fixation, spot enamel etching and bonding without preliminary polymerization were performed.
The next step was creating temporary constructions by direct method and transfer using silicone key and self-curing plastic Ivoclar Telio CS C&B (Ivoclar). After removing the silicone key, excess plastic in the gingival area was corrected with a flame bur. Then, adhesive polymerization was performed on teeth with temporary restorations (20 seconds).

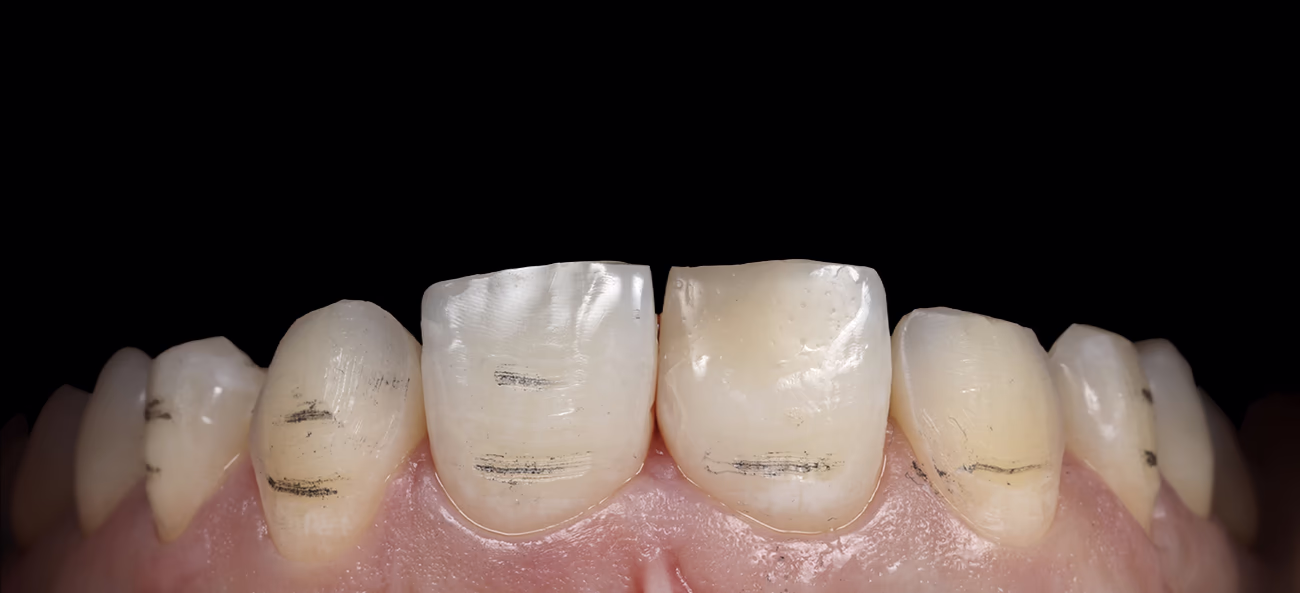
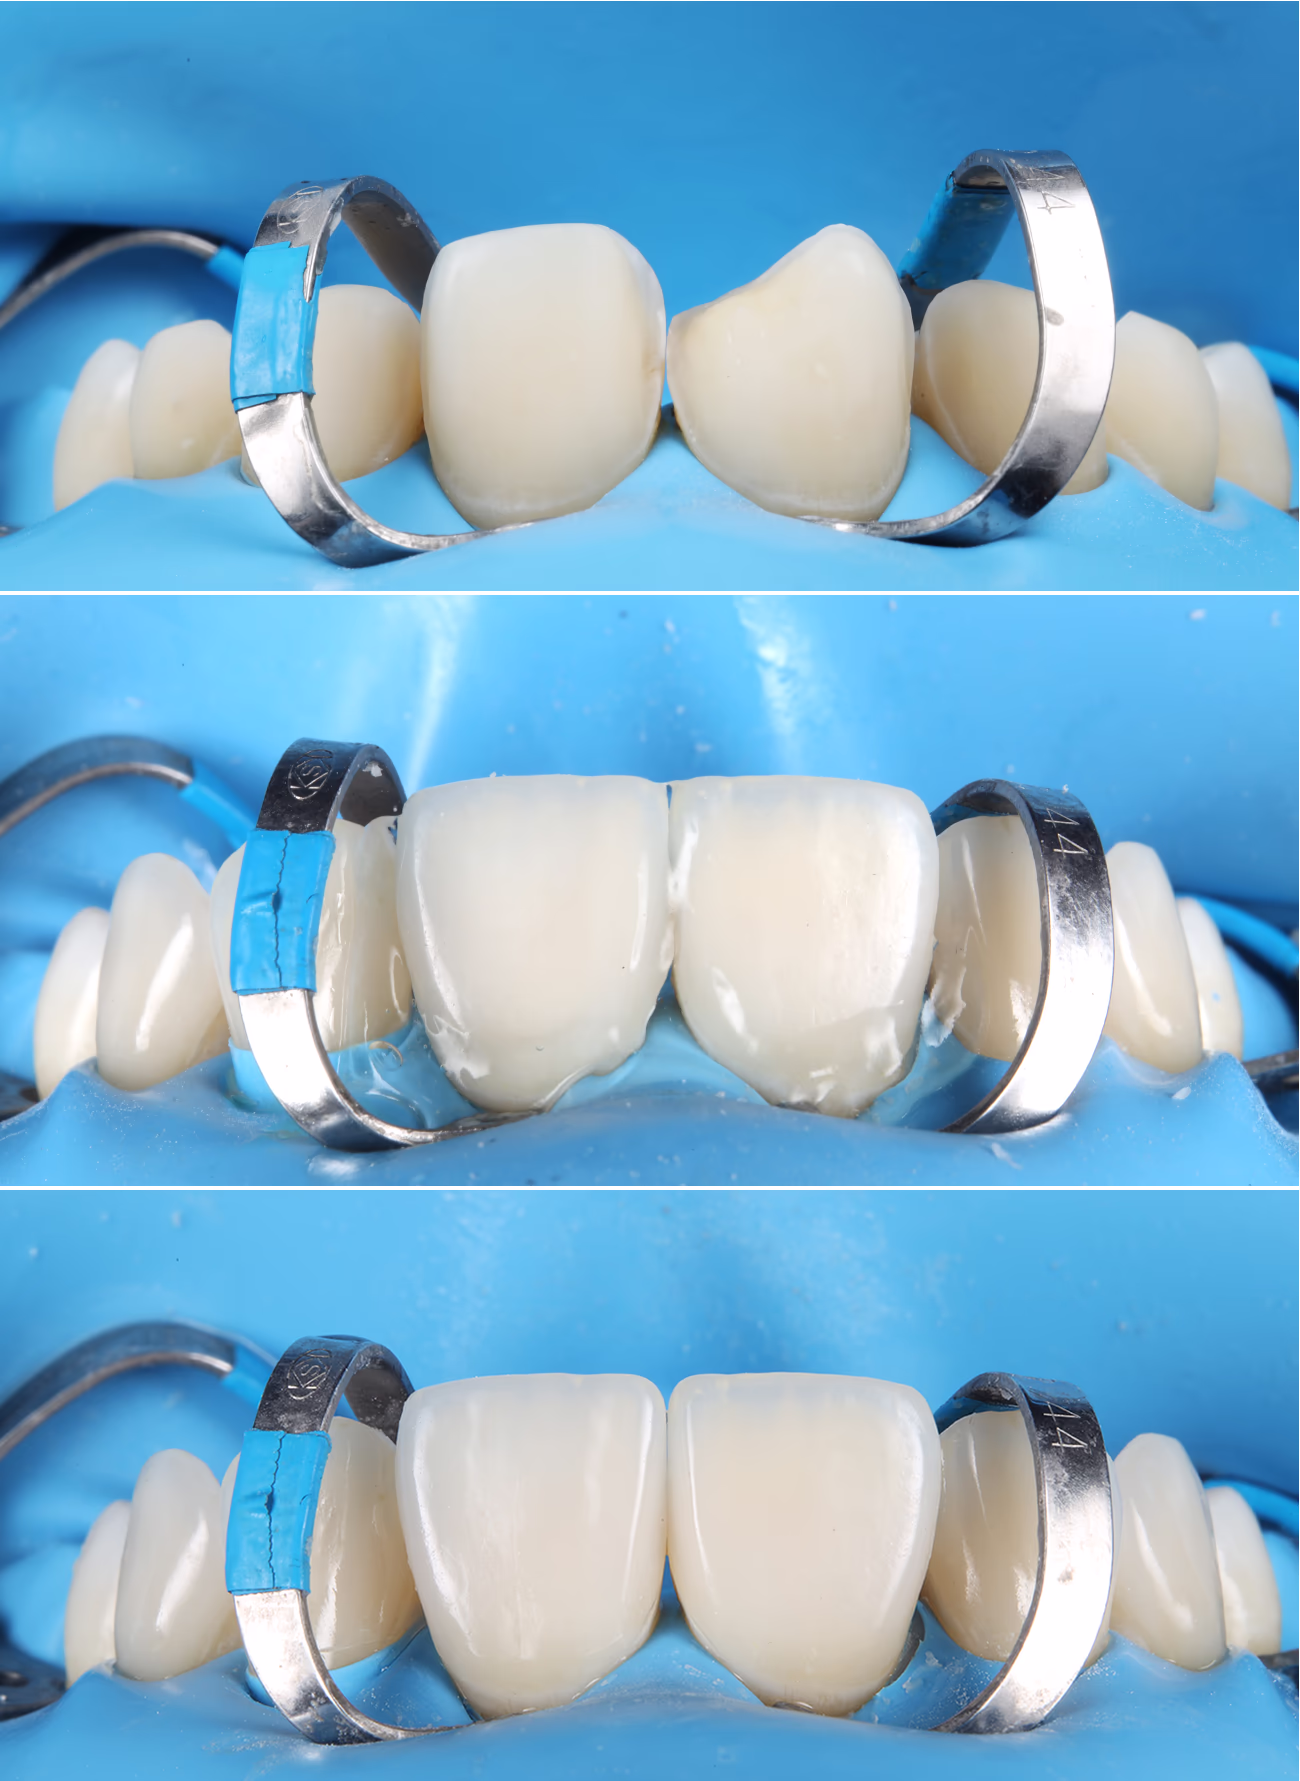
The third patient visit to the clinic was for ceramic veneer try-in and cementation.
The first step was removing temporary constructions and polishing teeth from adhesive residue.
Adequately adapted temporary restorations allow preservation of healthy soft tissue architecture even with prolonged wear. Dry Fit try-in on a dry surface allows control of construction fit accuracy.
During the second try-in, Ivoclar Try-In paste shade Warm (Ivoclar) was applied to the restoration to simulate the warm shade of permanent luting material.
After ensuring that restorations satisfy the patient's esthetic requirements, adhesive cementation can begin.
We performed isolation using a rubber dam system for operative field dryness control, which is very important during adhesive cementation.
After this, the adhesive preparation of the ceramic was performed:
ClearFil SE Bond 2 (Kuraray) adhesive system was applied to the silanized ceramic surface, 20-second exposure, then the solvent was removed using air. Variolink Esthetic LC luting composite shade Warm (Ivoclar) was applied. To prevent composite cement hardening, restorations were placed in an orange light-protective box.
Adjacent teeth were protected with Teflon.
After isolation, air-abrasion enamel preparation was performed with 27 μm aluminum oxide powder.
The surface micro-roughness obtained after treatment with 27 μm aluminum oxide increases the adhesive bond area. Dynamic tooth enamel etching for 30 seconds. Tooth adhesive preparation was performed using the ClearFil SE Bond 2 (Kuraray) system.
Spot polymerization of veneers on teeth was performed for 3 seconds. Then excess luting material from the facial surface was removed with a brush. After this, excess cement at proximal contacts was controlled using floss.
To avoid staining of the tooth-ceramic margin, the formation of an oxygen-inhibited layer should be prevented using Air-Block.
Adhesive and cement residue were carefully removed with a scalpel
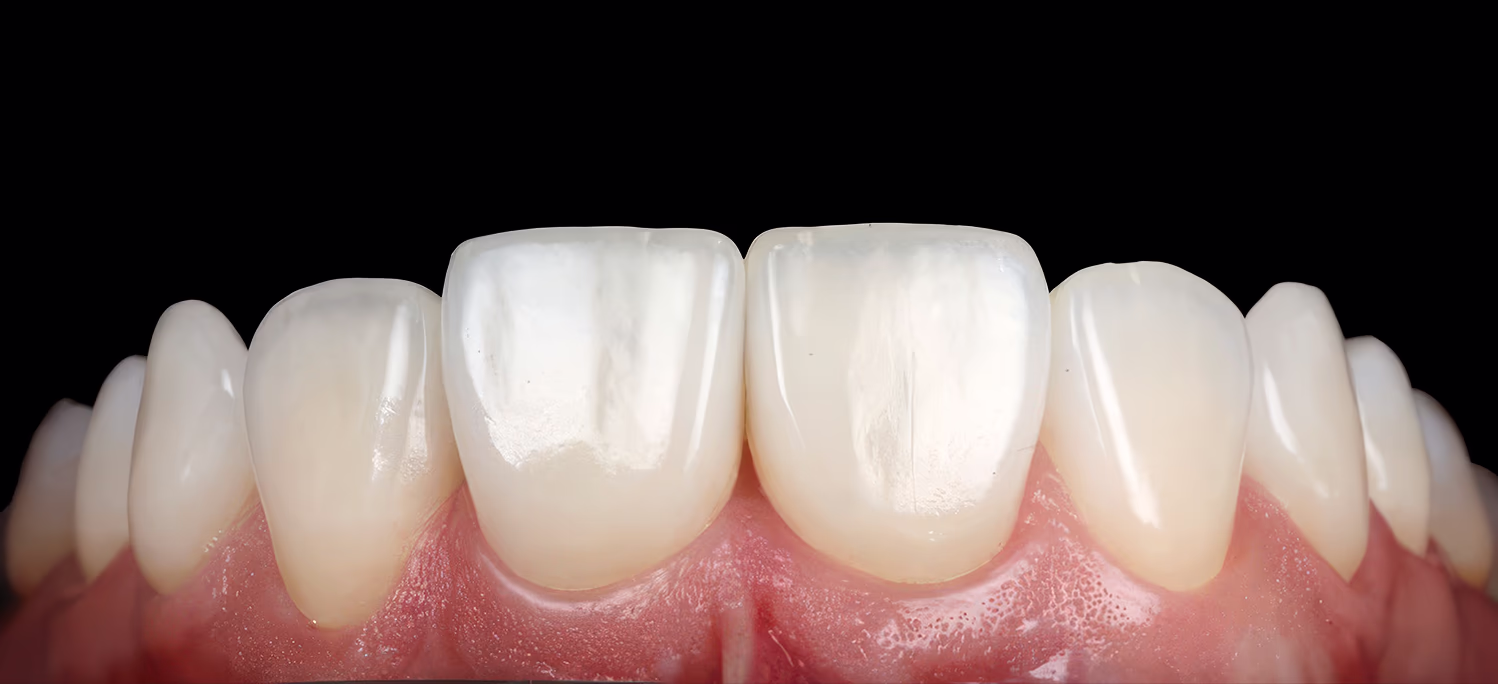
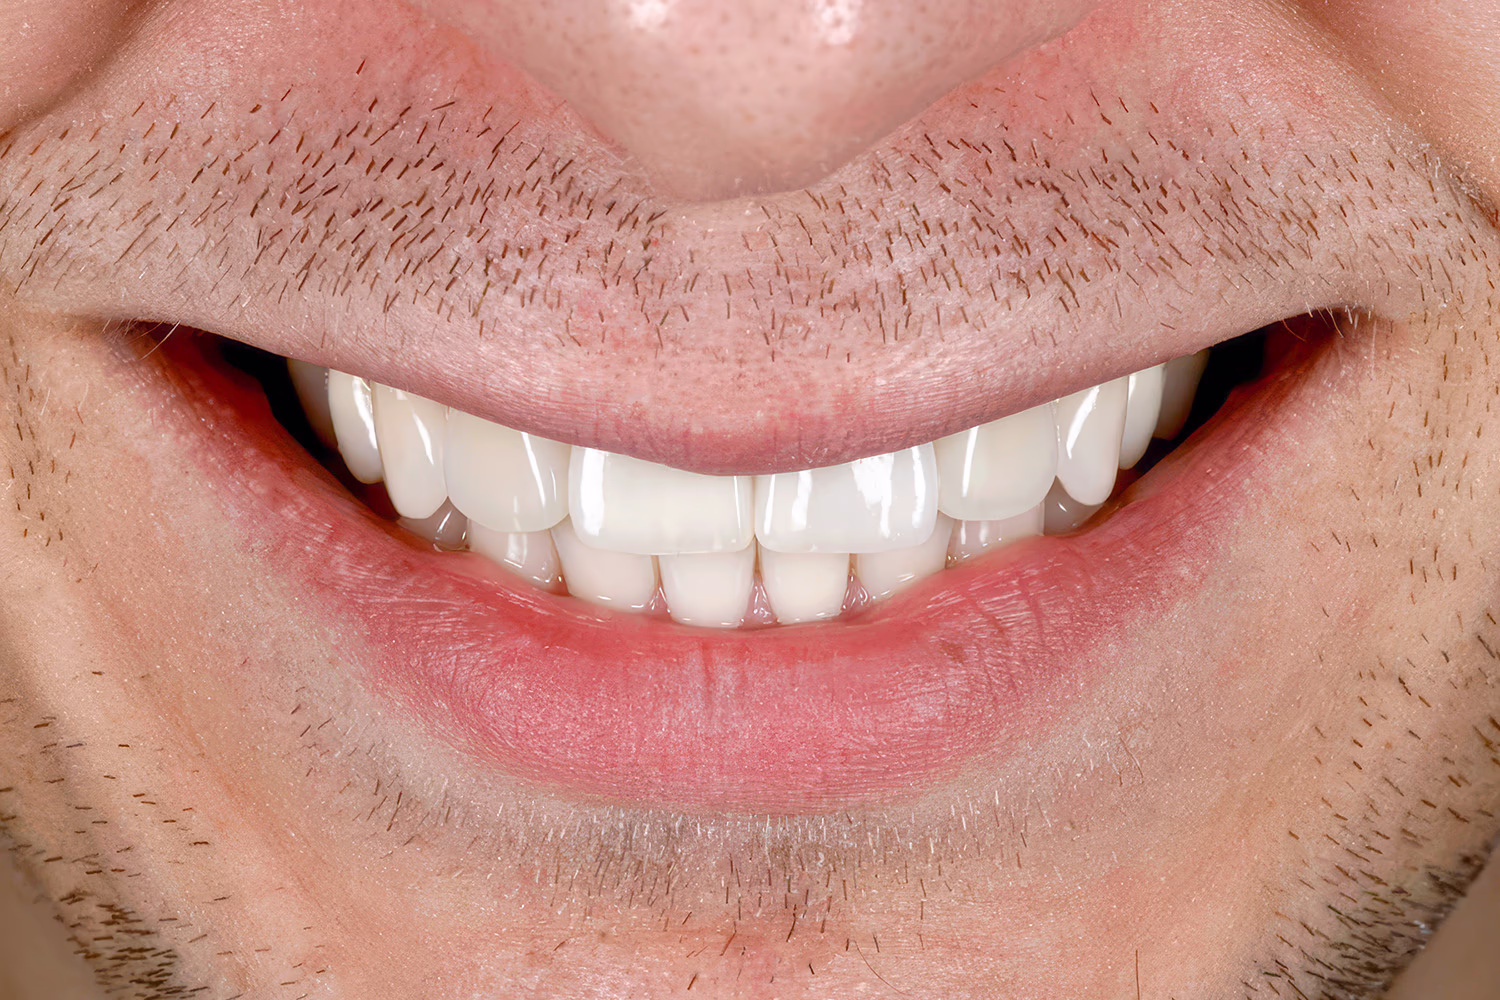
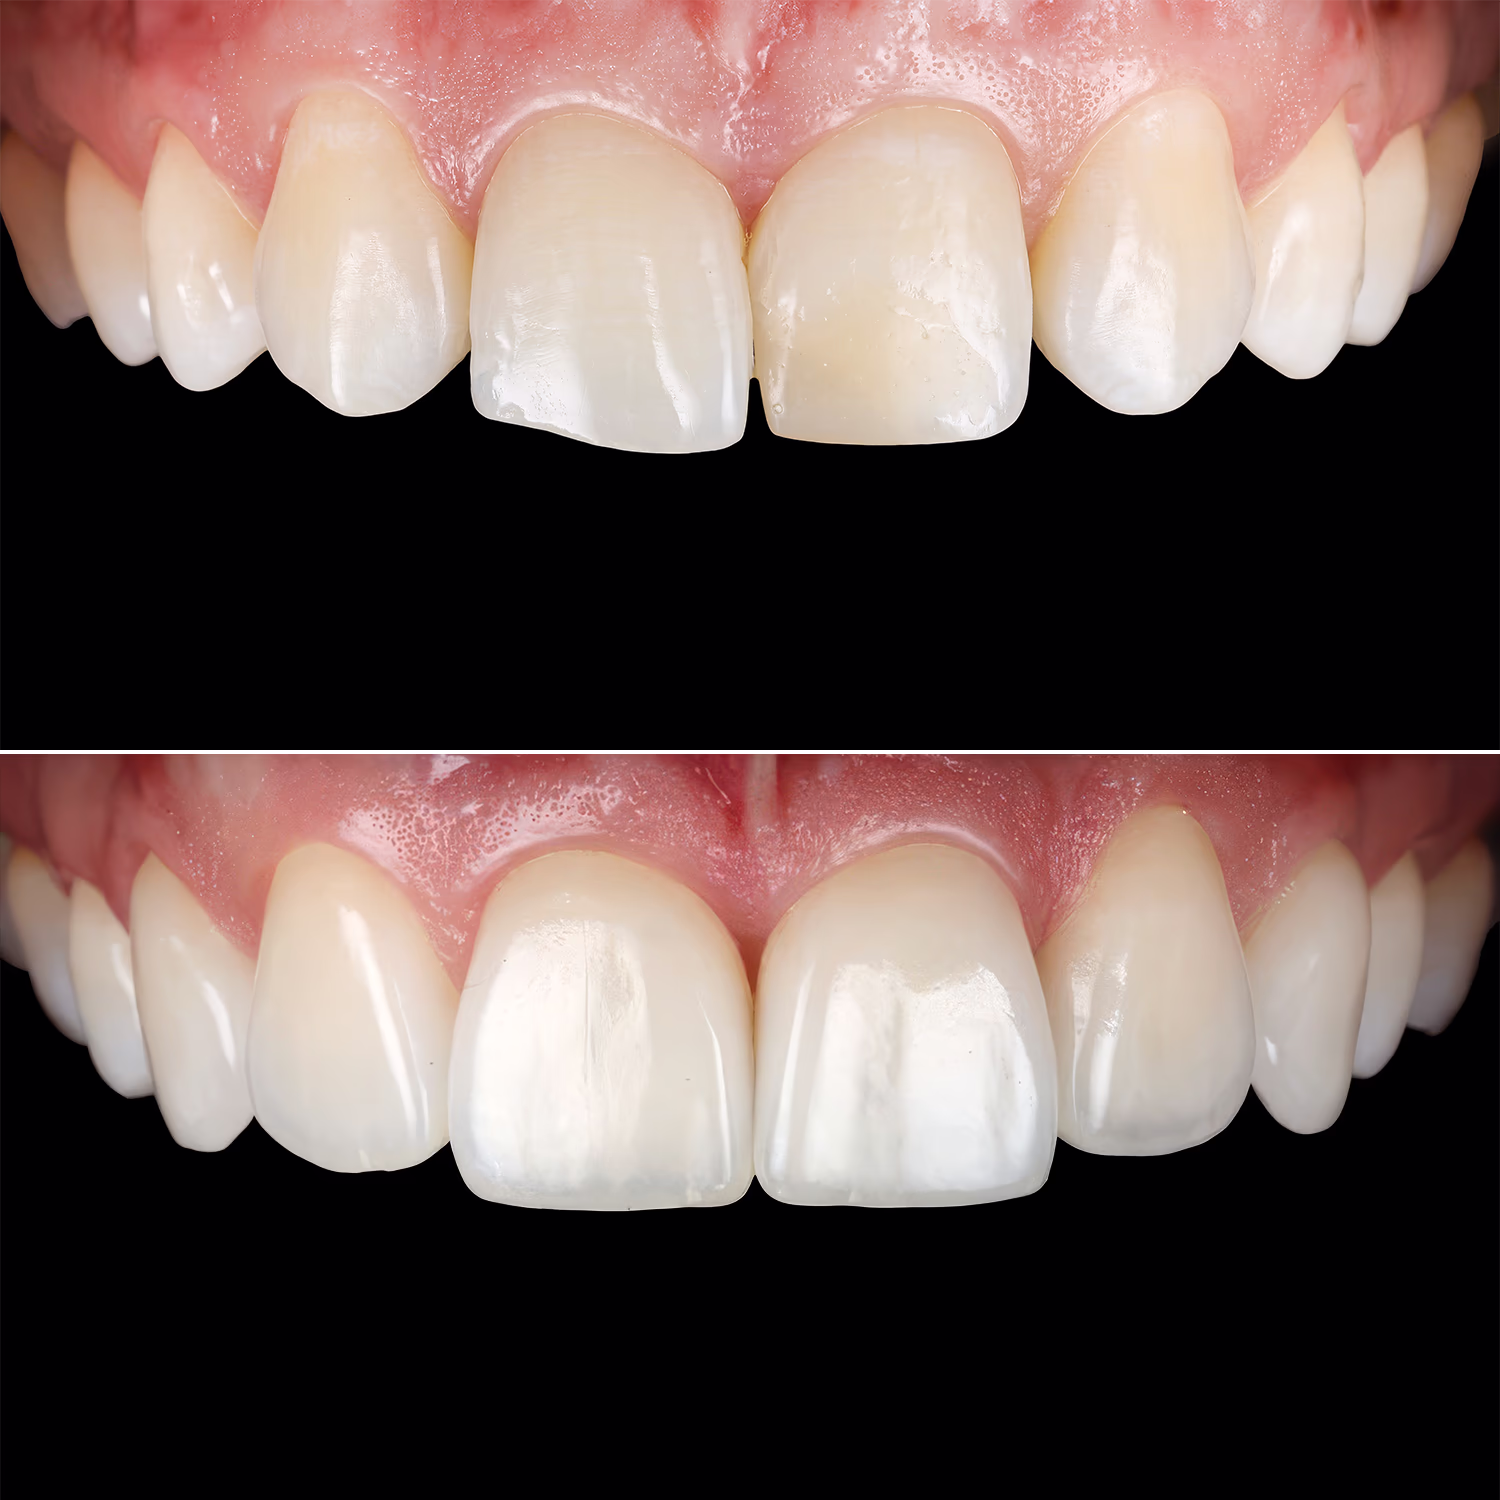
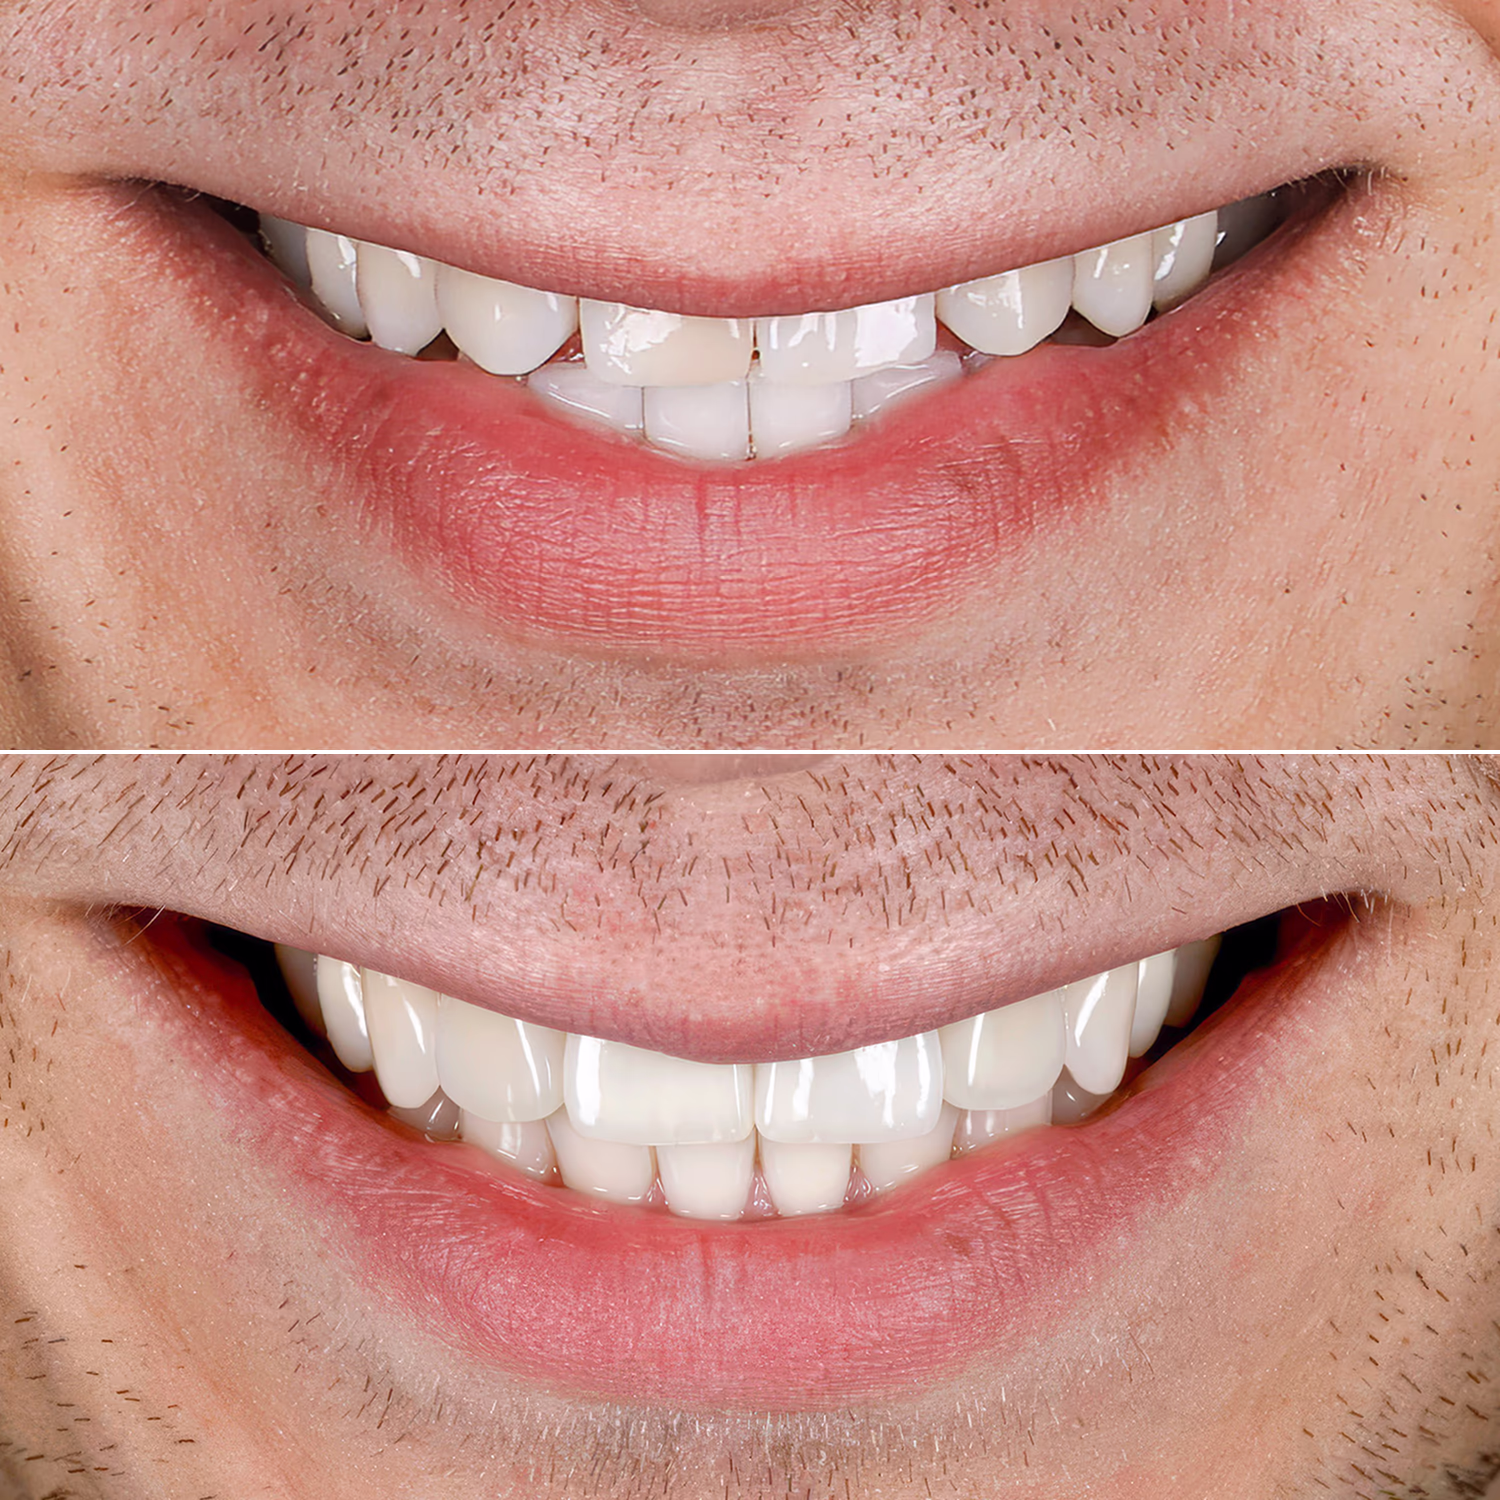

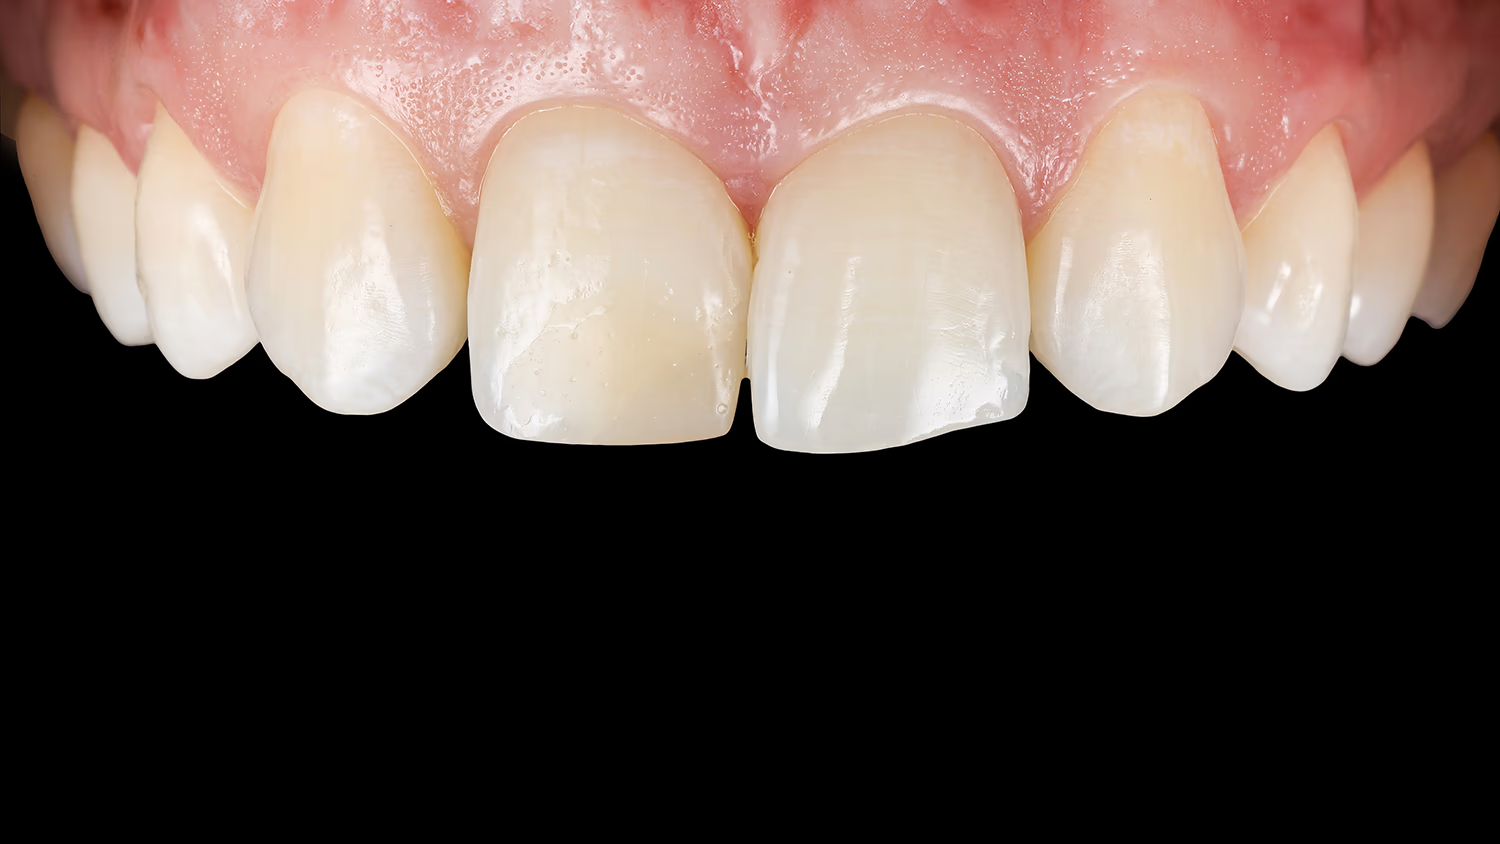
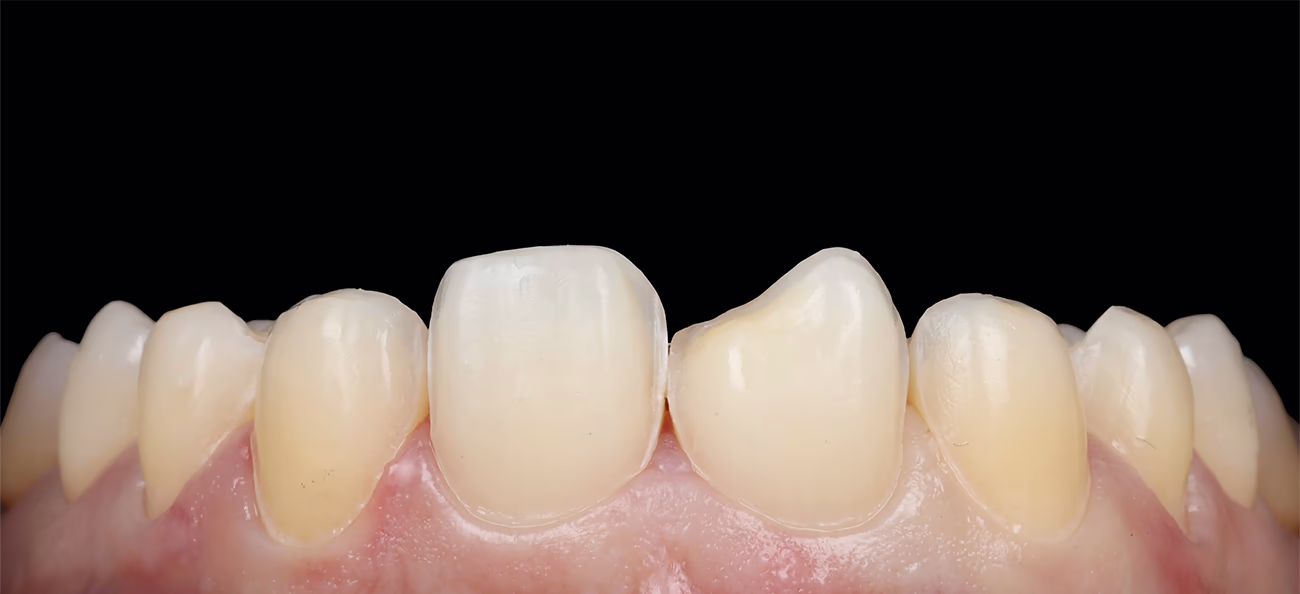
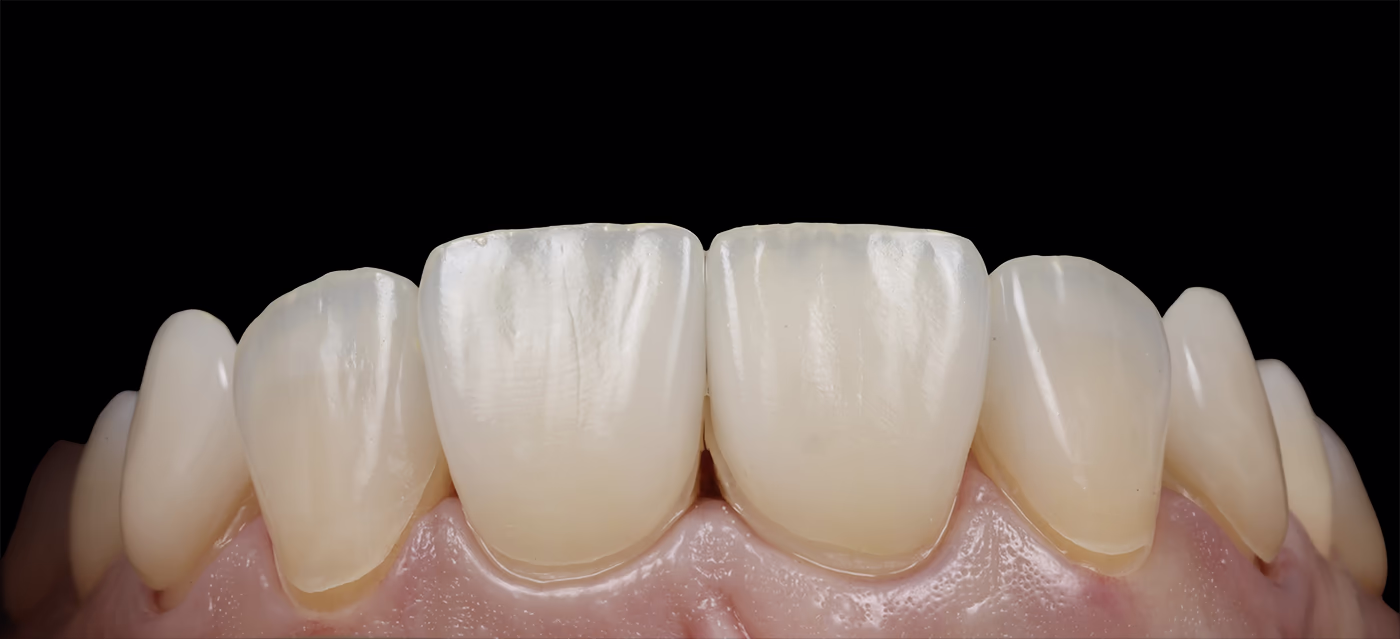
We successfully rehabilitated the patient in the esthetically significant zone. Maxillary lateral incisor agenesis is a quite quite a common diagnosis.
Decisions must always be made carefully in each clinical case. Space can be created for maxillary lateral incisor implantation and subsequent prosthodontic treatment. Or another treatment option can be chosen – transformation of canines into lateral incisors and first premolars into canines.
No ideal technique exists, and the result will always depend on the manual skills of the dentist and dental technician.